CPR Discrepancy: Myths vs. Reality.

image contains the title of the blog "CPR on Women - Closing the Gap" Next to the title, illustrates a woman doing CPR to another woman with the logo of LIfe Saving First Aid

Introduction

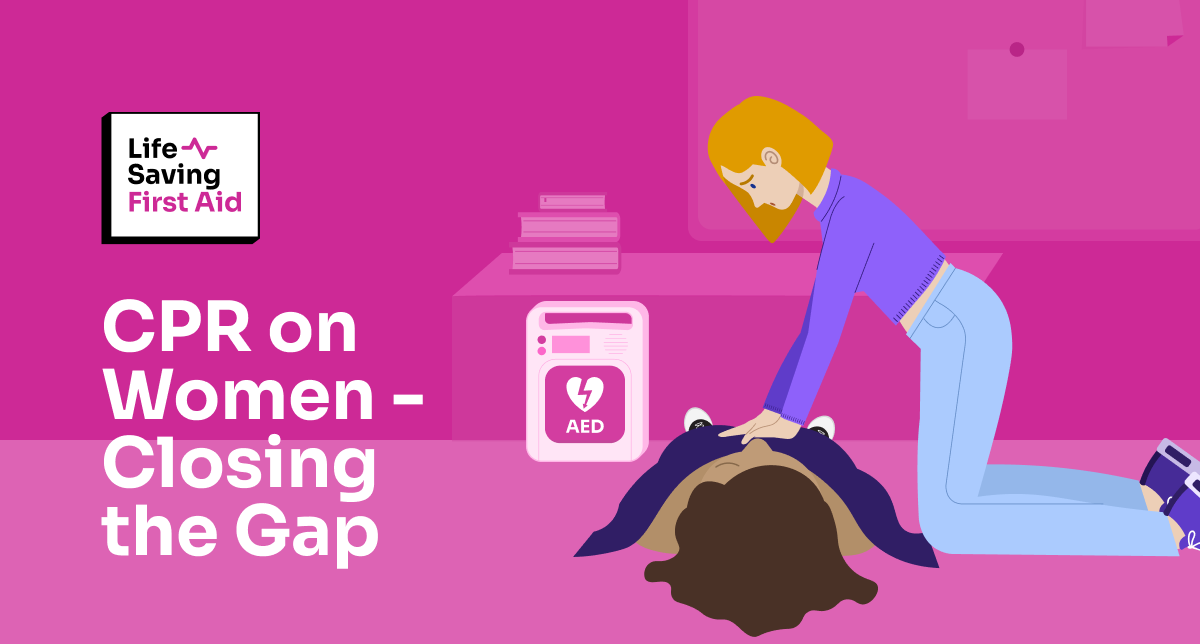
I want to talk about the CPR discrepancy and closing the gap, one rescue at a time.

Do you know that females in cardiac arrest are less likely to receive out-of-hospital cardiopulmonary compressions (CPR) than males? That is simply because the provision of bystander CPR is less likely to be performed on a female by a member of the public.  This is the CPR discrepancy.

Cardiac arrest:

A cardiac arrest is a life-threatening emergency situation where these casualties require immediate chest compressions to imitate the pumping of the heart, which promotes blood and oxygen delivery to the brain and other vital organs.

Despite the severity and complexity surrounding a cardiac arrest, the initial life-saving treatment simply involves using two hands to administer chest compressions in the centre of the chest, hard and fast. 

However, despite the simplicity of performing CPR, recent literature states that only 39% of women received CPR from bystanders in public compared to 45% of males. (American Heart Association) 

CPR on Women:

So, let’s unpack why the provision of CPR is less likely for Women and why the CPR discrepancy exists: 

Gaining an insight into understanding the public perceptions of why the provision of CPR is less likely in women is an essential measure towards promoting the equitable implementation of CPR. 

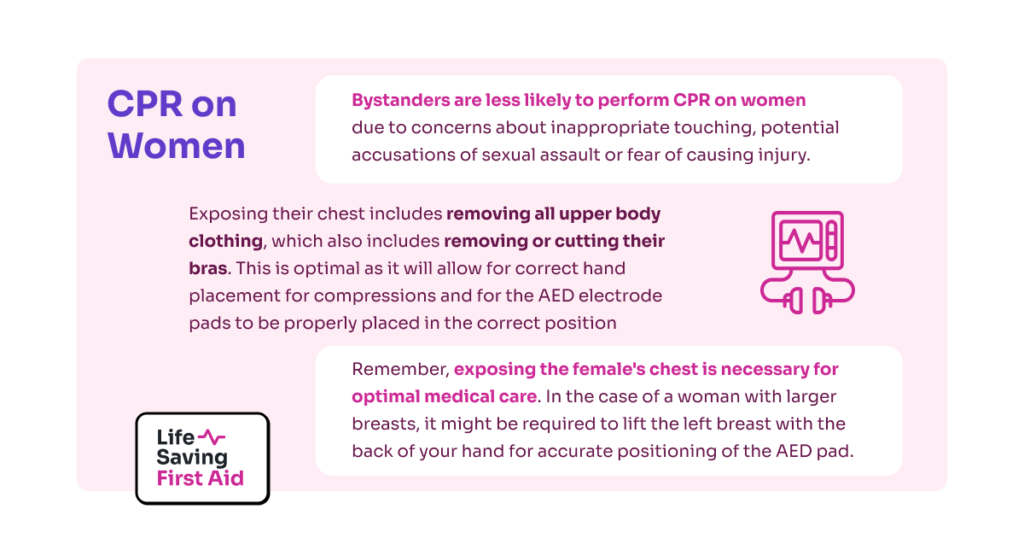
Bystanders are less likely to perform CPR on women due to concerns about inappropriate touching, potential accusations of sexual assault, or fear of causing injury.

Although these concerns for privacy and cultural sensitivity are valid, exposing the casualties’ chest must be done to initiate life-saving medical treatment. Using an Automatic External Defibrillator (AED) for example.

Exposing their chest includes removing all upper body clothing, which also includes removing or cutting their bras. This is optimal as it will allow for correct hand placement for compressions and for the AED electrode pads to be properly placed in the correct position. Further, as many bras include metal components, removing them reduces the risk of burns or electrical arcing during defibrillation. 

Remember, exposing the female’s chest is necessary for optimal medical care. In the case of a woman with larger breasts, it might be required to lift the left breast with the back of your hand for accurate positioning of the AED pad. When a bra is removed and a female is lying on their back, it’s likely the breasts will fall to the side and thus allow for correct hand placement in the centre of their chest without the requirement to touch them. This is the correct location to effectively deliver compressions. 

Preserving privacy:

Preserving the privacy of female patients can be achieved by continuing to treat them with dignity and respect at all times. It is important to ensure only those assisting with resuscitation are within sight of their exposed chest and for all other bystanders to maintain at a distance. In addition, capturing photos or videos of the casualty is inappropriate and unnecessary. Additionally, if there is a cloth or towel available, it can be used to cover the chest and preserve modesty, whilst compressions are provided.

CPR on pregnant women:

It is often misperceived that pregnant women who experience a cardiac arrest should not receive resuscitation with CPR and defibrillation. However, the standard protocol for resuscitation remains unchanged and it’s expected that they receive the same quality CPR and AED shocks as anyone else. Therefore, observing the same three life-saving procedures; calling 000, starting CPR, and utilising an AED as soon as possible is vital to attempt resuscitation.

Both compressions and defibrillation should not pose any significant risk to the mother or baby. However, there are some alterations we can practice to further mitigate any risks.

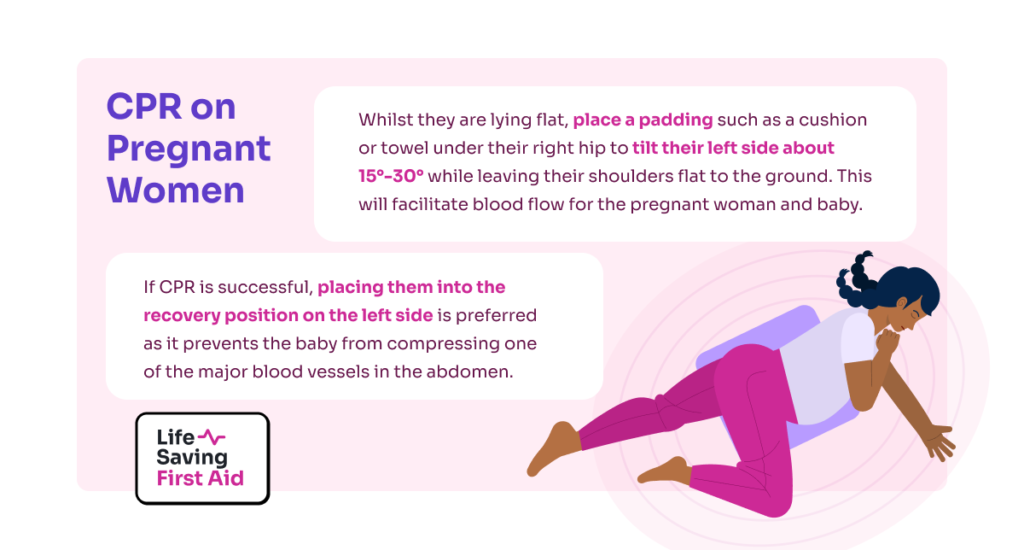
Whilst they are lying flat, place a padding such as a cushion or towel under their right hip to tilt their left side about 15°-30° while leaving their shoulders flat to the ground. This will facilitate blood flow for the pregnant woman and baby.

Finally, as for all patients, if CPR is successful, placing them in the recovery position whilst you wait for the ambulance to arrive is ideal. However, the left side is preferred as it prevents the baby from compressing one of the major blood vessels in the abdomen.

Conclusion:

Remember, if you attempt to resuscitate and save the life of a female casualty with genuine and well-intentioned efforts, you will always be protected under the Good Samaritan Legislation.

I hope this blog encourages strong public education and eliminates the biases surrounding bystander CPR on female casualties so we can make a difference together and save lives, regardless of gender, one rescue at a time.

Thanks for tuning in, see you in the next blog! – Dounia

PS: Click here for more First Aid info

How is antivenom made?

Image depicts a stylised illustration of a horse preparing to be injected with snake venom, infront of it, there is a hand holding the syringe with the antivenom. Title of the blog "How Antivenom is made" followed by Life Saving First Aid logo

Introduction:

Australia is home to around 139 species of venomous snakes. This includes 109 land-based and 30 marine-based species. Not all of these are dangerously venomous. Approximately one-third of them are however so, you can see how important snake antivenom is.

How is snake antivenom made? It’s a pretty interesting story and process.

Snake Venom:

First, a bit about venom.

Snake venom is created in the modified salivary glands of the snake. It is a complex mixture of enzymes and proteins of various sizes, amines, lipids, nucleosides, and carbohydrates.

Snake venom affects the body in 4 different ways:

·        Neurotoxic – Damaging to the nervous system and the brain – interfering with the neurotransmitters sending signals to your muscles.

·        Hemotoxic – Thinning out the blood preventing clotting. Leading to fatal internal haemorrhage and cardiovascular collapse.

·        Cytotoxic – Attacking cells leading to oedema (fluid retention), severe blistering, apoptosis (cell death), and necrosis.

·        Myotoxic – destroying muscles and causing paralysis and cardiac arrest.

Some snake venom contains a mixture of all four types of toxins. Nasty Stuff.

how the snake venom affects the body:
nake venom affects the body in 4 different ways:  1. Neurotoxic - Damaging to the nervous system and the brain - interfering with the neurotransmitters sending signals to your muscles.  2. Hemotoxic – Thinning out the blood preventing clotting. Leading to fatal internal haemorrhage and cardiovascular collapse.  3. Cytotoxic – Attacking cells leading to oedema (fluid retention), severe blistering, apoptosis (cell death), and necrosis.  4. Myotoxic – destroying muscles and causing paralysis and cardiac arrest.

Snakebite:

Australian venomous snakes all belong to the Elapid family of snakes and as such their fangs are hollow, short and located at the front of their jaw.

When the snake bites, venom is injected into the lymphatic system of the casualty. This happens because elapid snake fangs are short.

To enter the bloodstream and begin to affect the victim, the venom must be transported to areas such as the groin or armpits

The venom of the Elapidae family is primarily neurotoxic with some myotoxic effects.

If you are treating a snake bite in Australia use the Pressure Immobilisation Technique – PIT. Click HERE for details of this technique.

Australian venomous snakes all belong to the Elapid family of snakes and as such their fangs are hollow, short and located at the front of their jaw.  When the snake bites, venom is injected into the lymphatic system of the casualty.  This happens because elapid snake fangs are short.  To enter the bloodstream and begin to affect the victim, the venom must be transported to areas such as the groin or armpits

Antivenom – A Brief History:

Albert Calmette, a French physician produced an antivenom for cobra venom in 1895 which was to revolutionise the treatment of snakebite worldwide.

In 1898 here in Australia, Frank Tidswell undertook pioneering experiments in active immunisation using tiger snake venom. Then in 1901, he produced Australia’s first experimental antivenom.

Around 1900 Charles Martin (Universities of Sydney and Melbourne) made several important advances relating to venoms. Including:

·        Proving that Calmette’s anti-venom did not work for every snake.

·        Conducting the first investigations into the chemistry of Australian venoms.

·        Observing the action of venom on the body and its systems.

·      Proposing that intravenous injection could be used to administer antivenom

·        Concluding that the dose of venom injected influences the volume of antivenom used in treatment.

In 1928, research was led by Frank Morgan from Commonwealth Serum Laboratories (CSL )and Neil Fairley and Charles Kellaway from the Walter and Eliza Hall Institute (WEHI) into antivenom for Tiger snake and by October 1930 the first tiger snake antivenom was available commercially.

“While CSL had produced experimental antivenoms for many species it wasn’t until July 1955 that Australia’s second commercial snake antivenom for the taipan was released. This was followed by antivenoms for the brown snake (1956), redback spider (1956), death adder (1958), black snake (1959), stonefish (1959) and sea snake (1961). In 1962 a polyvalent snake antivenom was released to treat victims where the snake was unknown.

In 1970, an antivenom for the box jellyfish was used successfully. One for the funnel web spider followed in 1981. Today CSL continues as the only producer of human antivenoms in Australia”.(Source: Venoms & Antivenoms at Museum Victoria)

As you can see, Australia played an important role in antivenom research.

Hmm. That’s great…But get to the point! How we make snake antivenom?

berief history of antivenom
antivenom advances made by charles martin

Antivenom production:

Antivenom works by stimulating the production of antibodies. The immune system produces antibodies to neutralise dangerous antigens like viruses and bacteria. Antigens can also be effective in neutralising venom.

Antivenom does not destroy the venom’s toxins or reverse the venom’s effects on the body. However, the antibodies the antivenom creates can suppress the venom’s toxins preventing their spread and making them harmless.

To make antivenom you need venom. Lots of it. The Australian Reptile Park, located in the central coast region of NSW has been the sole supplier of terrestrial snake venom for the purpose of making antivenom.

At the Australian Reptile Park, snake handlers milk 250 venomous snakes every fortnight. The Collected venom is freeze dried and the crystals are packaged and sent to be made into antivenom.

Australia uses horses for the production of all snake antivenom. Over a period of six months, the horses are injected with increasing doses of venom. During this time, they build up antibodies to the snake venom.

Blood is taken from the horses and the antibodies in the blood are extracted. These are purified and reduced to a usable form ie Antivenom.

( Oh, and by the way..the horses have a great life and suffer no inconvenience from this process. )

Then the antivenom is distributed (read SOLD..) to whoever needs it.

antivenom production

Which Antivenom for which snake?:

Identification of the snake will assist with the choice of the right antivenom for that snake. It will also indicate to the doctor the particular features and characteristics of envenomation by that type of snake.

Identification of snakes by the casualty, general public or by hospital staff is often inaccurate.

Sometimes, the snake is not even seen or is only glimpsed getting away. In these cases, a snakebite venom detection kit may be used.

Australia is the only country in the world that has snake venom detection kits.

The kits consist of a fast-acting two-step enzyme immune test in which wells are coated with antibodies to the various snake venoms.

The doctor will take a swab from the bite site and use the antibodies to determine the type of snake antivenom to be used.

which antivenom for which snake

Other Anti-Venoms:

As you are aware, Australia is home to lots of other venomous creatures. Fortunately, we have anti-venom most of the dangerous ones.

  • Funnel-web spider – produced in Rabbits
  • Redback Spider – produced in Horses
  • Aust. paralysis Tick – produced in Dogs
  • Box Jellyfish – produced in Sheep
  • Stonefish – produced in Horses

Conclusion:

Thanks to the early research, Australia is in a fortunate position. We have good antivenom. Combined with good ambulance service and a good hospital system they all work together to reduce the impact of venomous bites on our community.

You should, of course, carry a snake bite kit with you…Just in case.

Last word from WC Fields:

“Always carry a flagon of whiskey in case of snakebite and furthermore always carry a small snake.”

Well, that’s that. Until next time…Stay safe.

First Aid for Musculoskeletal Injuries.

title of the image Introduction to the musculoskeletal system by life saving first aid dot com dot au. illustration on the right depicting a skeleton with a top hat gleefully dancing followed by Life Saving First Aid logo

Introduction to the musculoskeletal system

As a first aider, you should have at least a basic understanding of how the musculoskeletal system works. Bones and muscles are the heavy lifters when it comes to moving, standing still and even keeping us alive. Some muscles we can control, some function without our conscious input.

Can you imagine what we would look like as a species if we had no skeleton? No bones in our bodies?

Let’s start with the Skeletal System

The Skeletal system

The skeletal system – sometimes referred to as the Musculoskeletal System – consists of Bones, Ligaments, Tendons, and Joints.

The major functions of the skeletal system are:

  • Body support,
  • Facilitation of movement,
  • Protection of internal organs,
  • Storage of minerals and fat,
  • Support the production and replenishment of blood for the body

Skeletal systemBones

The adult human skeletal system has 206 bones, joined together by Joints, Ligaments, and Tendons.

Bones are a rigid form of connective tissue. Composed principally of calcium, they support the body and protect the organs. The bones also provide a surface for muscles to attach to.

A baby’s body has about 300 bones at birth. These eventually grow together to form the 206 bones that adults have. Some of a baby’s bones are made entirely of cartilage while others are partly made of cartilage. This cartilage is soft and flexible. During childhood, as a person grows, the cartilage grows and is slowly replaced by bone, with help from calcium.

Therefore, for example, when performing CPR on an Infant we use only 2 fingers, or one hand for a child, and press down with less effort. Their bones are much more flexible than adults.

Older people are more likely to suffer from osteoporosis, which affects their bones. Their bones may become more brittle and break easily, or less dense and therefore not as strong. In fact, their entire Musculoskeletal system may be weaker and less robust than a young person.

Ligaments

Ligaments are bands of tough elastic tissue around your joints. They connect bone to bone, give your joints support, and limit their movement. You have ligaments around your knees, ankles, elbows, shoulders, and other joints.

Tendons

Tendons are tough, flexible, and inelastic bands of fibrous connective tissue that connect muscles to bones.

Joints

The joints connect bone to bone, and there are 360 joints in our bodies. Joints hold the skeleton and support movement. We group joints together by their function and structure. The types of joints are ball-and-socket, hinge, and pivot joints.

Three kinds of freely movable joints play a big part in voluntary movement:

  • Hinge joints – allow movement in one direction, as seen in the knees and elbows.
  •  Pivot joints – allow a rotating or twisting motion, like that of the head moving from side to side.
  • Ball-and-socket joints – where the round end of a long bone fits into the hollow of another bone allow the greatest freedom of movement. The hips and shoulders have this type of joint.

Tendons and ligaments keep the Musculoskeletal system joined together, working with the joints to support movement.

Skeletal system problems for the first aider

For a first aider problems with bones include:

  • Fractures – when a bone is broken
  • Dislocations – where two bones have separated at a joint
  • Spinal Injuries – severed spinal cord
  • Skull injuries – fractured or punctured
  • Sprains – where the ligaments that connect and stabilise the bones in a joint are stretched or torn

According to Healthy Bones Australia, in 2022, it is estimated there will be 6.2 million Australians over the age of 50 with osteoporosis or osteopenia – commonly seen in people over age 50 who have lower than average bone density but do not have osteoporosis. Osteoporosis is rare in children and adolescents.

Muscles

Included in the Musculoskeletal system are the muscles. There are about 600 muscles in the human body; the three main types of muscle are skeletal, smooth, and cardiac.

A muscle is made up of thousands of elastic fibres bundled tightly together. Each bundle is wrapped in a thin transparent membrane called a perimysium.

Skeletal muscles are the most common muscles in the body as they move the bones. They play a vital role in everyday activities. Skeletal muscles are also responsible for generating heat in the body to maintain body temperature and help regulate blood sugar levels.

Skeletal muscle (voluntary muscle or striated muscle) is the muscle that you can consciously control. Skeletal muscles run from one bone to another, usually passing at least one joint. 

Skeletal muscle injuries or diseases can profoundly affect a person’s life.

Smooth Muscle

Smooth muscle is present throughout the body, where it serves a variety of functions.

Found in the blood vessels such as arteries assisting the heart in moving blood around the body. In the stomach and intestines, smooth muscle helps with digestion and the collection of nutrients. It exists throughout the urinary system, where it functions to help rid the body of toxins and works in electrolyte balance.

Cardiac

Cardiac muscle differs from skeletal muscle in that it exhibits rhythmic contractions and is not under voluntary control. Rapid, involuntary contraction and relaxation of the cardiac muscle are vital for pumping blood throughout the cardiovascular system. To accomplish this, the structure of cardiac muscle has distinct features that allow it to contract in a coordinated fashion and resist fatigue.

Voluntary and involuntary muscles.

As you can see, muscles have a range of functions from pumping blood and supporting movement to lifting heavy weights.

Muscle movement made consciously is called voluntary. Involuntary muscle movement is a movement made without conscious awareness.

Generally, any movement of the Musculoskeletal system is voluntary. Skeletal muscles work in pairs. As a result, if your brain signals a muscle to contract, it shortens, pulling one bone towards another across a joint. When one shortens, a corresponding muscle lengthens.

A good example of this action is your upper arm.  As you contract your bicep on the front of your upper arm, your tricep on the back of your upper arm lengthens. And vice versa.

Involuntary muscles on the other hand operate without conscious thought or input. Smooth muscle inside blood vessels and organs like the intestines for example. It contracts to move substances through the organ, and so helps regulate your blood pressure, airways, and digestion.

Muscle problems for the first aider

Some of the more common muscle problems for a first aider include

  • Strains – where the muscle is over-stretched or contracted too quickly, leading to a partial or complete tear of the muscle fibres or the tendon
  • Muscle cramps – These sudden contractions of a muscle can be very painful
  • Tendonitis – inflammation or irritation of a tendon, the fibrous cord that attaches a muscle to the bone

For how to deal with soft tissue injuries check out our post ” Ricer. Initial first aid action plan for sprains and strains”

Points to remember:

  • The Musculoskeletal system comprises the muscles, skeleton, tendons, and ligaments
  • Some muscles operate automatically without conscious input from us
  • Most body movement requires conscious input from our brain
  • The Musculoskeletal system is prone to injury and requires first aid or more advanced medical care
  • There is a difference in the strength of the system depending on the age of the person

Well, that’s that. Until next time… Stay safe.

Essential First Aid Tips for Managing Diabetes Emergencies.

Image depicts a Person consulting a general practitioner asking about her diabetic analysis. Title of image and blog is "Diabetes: Signs, symptoms, and management" followed by Life Saving First Aid logo

Introduction

In this article we are going to look at Diabetes, what it is, how to recognise the signs and symptoms of Hypoglycaemic and hyperglycaemic conditions, and how to manage them and assist the casualty.

Here’s a few quick facts about diabetes.

According to Diabetes Australia

  • More than 300 Australians develop diabetes every day. That’s one person every five minutes
  • Almost 1.9 million Australians have diabetes. This includes all types of diagnosed diabetes (almost 1.5 million known and registered) as well as silent, undiagnosed type 2 diabetes (up to 500,000 estimated)
  • Almost 120,000 Australians have developed diabetes in the past year
  • For every person diagnosed with diabetes, there is usually a family member or carer who also ‘lives with diabetes’ every day in a support role. This means that an estimated 2.4 million Australians are affected by diabetes every day
  • The total annual cost impact of diabetes in Australia is estimated at $17.6 billion (inflation-adjusted)

In fact, diabetes is the fastest-growing chronic condition in Australia, increasing at a faster rate than other chronic diseases such as heart disease and cancer.

All types of diabetes are increasing in prevalence.

What is Diabetes?

Diabetes is a chronic, lifelong medical condition which occurs when the pancreas fails to produce sufficient insulin, or the body develops a resistance to the action of its own insulin. Untreated, the absolute or relative lack of insulin will lead to a high blood glucose level.

When the body does not produce enough insulin or does not use insulin, glucose stays in your blood and does not reach the cells. This prevents the cells from functioning normally.

There are two main types of diabetes: Type 1 and Type 2.

Type 1 Diabetes

Type 1 diabetes is an auto-immune disease that often develops in childhood and requires lifelong treatment with insulin.

Type 2 Diabetes

Type 2 diabetes is more commonly recognised in adulthood and requires a treatment combination of diet, exercise, oral medication, and sometimes insulin.

A third type of diabetes is Gestational Diabetes

Gestational diabetes is a relatively common condition specific to pregnancy.

Diabetes can also occur because of another disease or as a side effect of medication.

Blood Sugar levels

When blood glucose levels become too high or too low, people with diabetes may become unwell and need first aid or treatment at a medical facility.

The normal range of glucose concentration in the blood of a healthy person ranges from 4.0 – 7.8 mmol/L.

As a result, if someone has abnormal levels of blood sugar, they can either be HYPOglycaemic – LOW blood sugar, or HYPERglycaemic – High blood sugar.

You can use a blood glucose meter to determine a person’s blood glucose level. There are different types of blood glucose meters and for more info click here.

Hypoglycaemia

Hypoglycaemia – Hypo for short, can occur because of:

• Too much insulin or other blood glucose-lowering medication.

• Inadequate or delayed carbohydrate intake after their usual insulin or oral medication dose.

• Exercise without adequate carbohydrate intake.

• Possibly delayed for up to 12 hours or more after exercise.

• In the setting of other illnesses; or excessive alcohol intake.

If the person injects too much insulin, doesn’t eat, or undertakes exercise without replenishing sugar levels they can go into a Hypo.

Signs and Symptoms of Hypoglycaemia

Some or all of the following are signs and symptoms of a Hypo.

• Weakness, shaking

• Sweating

• Faintness, dizziness

• Teariness or crying

• Hunger

• Numbness around the lips and fingers

• Sweating,

• Pallor (pale skin), especially in young children

• A rapid pulse; and a headache.

• Mood or behavioural changes, with confusion, inability to concentrate, and slurred speech.

• Inability to follow instructions.

• Unresponsive; or seizure, can lead to coma and possibly be fatal

Hypo management

The recommended way to manage a person with Hypoglycaemia is:

• Stop any exercise, make them comfortable, reassure them, and follow the person’s diabetes management plan if they have one.

• If the casualty is fully conscious and able to swallow give them some sweets such as jellybeans or a sugary drink. This will raise their glucose level and you should see some positive results within a few minutes.

• Do not give them diet beverages or sugar-free sweets.

• If their condition improves give them a meal or something to eat and monitor their condition.

If the person does not improve with this treatment, is seizing or is unconscious, call for an ambulance. I

If they are unresponsive and not breathing normally, commence resuscitation.

For an unconscious breathing person, place them into the recovery position and ensure the airway is clear.

Monitor their condition until the ambulance arrives.

Hyperglycaemia

Hyperglycaemia, Hyper for short, or high blood sugar level can occur because of

• Inadequate levels of insulin

• Incorrect doses of diabetes oral medications, infections,

• Excess carbohydrate intake,

• Stressful situations.

Hyperglycaemia can develop over hours or days, and many people do not experience symptoms from hyperglycaemia until their blood glucose levels are extremely high.

Hyperglycaemia can also occur at the time of initial diagnosis of diabetes and may go unrecognised until the person is clearly unwell.

If untreated, the person gradually deteriorates and can go into a coma.

Signs and symptoms of Hyperglycaemia

These may include:

• Excessive thirst with frequent urination/

• Dry skin and mouth, with sunken eyes (signs of dehydration)

• Recent weight loss

• Rapid pulse

• Nausea, vomiting and abdominal pain

• Rapid breathing

• Fruity sweet smell of acetone on the breath (like paint thinner or nail polish remover)

• Confusion and a deteriorating level of consciousness

• or unresponsiveness

Hyper management

The recommended way to manage a person with Hyperglycaemia is:

Follow the person’s diabetes management plan. If the person does not have a management plan, call 000 as they should be assessed by a health care professional.

• For unresponsive casualties with abnormal breathing, proceed with resuscitation.

• For unconscious casualties who are breathing normally, lay them down on their side in the recovery position and check to see that the airway is clear of any obstruction.

• Call 000

Conclusion

If you are unsure if the person has a high or low blood glucose level, the safest option is to treat hypoglycaemia (low blood glucose level).

Giving the casualty sweets may lead to a marked improvement if their blood glucose level is low. Indicating low blood sugar.

No improvement after giving sweets would indicate high blood sugar levels, and, if that’s the case, the small amount of sugar given would have little effect on blood sugar levels.

Let’s recap the main points:

• Hypoglycaemia is LOW blood sugar caused by too much insulin

• Hyperglycaemia is HIGH blood sugar. Not enough insulin.

• For a Hypo if conscious and able to swallow give the casualty sweets or a sweet drink

• If this does not improve their condition or they go unconscious call 000 Place in recovery  position or CPR as required

Remember, If in doubt about their condition, Hypo or Hyper, treat as Hypo

If you liked this article click here for more First Aid-related info

Well, that’s that. Until next time… Stay safe.

Needle stick injury

Image of someone who got their feet poked with a syringe in a park. The title of the blog is :Needlestick Injurt First Aid" followed by Life Saving First Aid logo

Introduction

What is a needle stick injury?

If the skin is punctured by a sharp medical tool like a scalpel or needle on a syringe, it is called a ‘needlestick injury’.

Exposure to hypodermic syringes is a risk faced by First Aiders so an understanding of the procedures to deal with a needle stick injury is important.

How does needle stick injury happen?

Needlesticks don’t just happen in hospitals – stepping on a needle in park or on the beach is the same thing. Fortunately, infection by HIV, hepatitis B or hepatitis C in these situations is  rare.

According to the National Centre For Farmer Health, even farmers and agricultural workers experience preventable needlestick injuries. Every year, across Australia, 80% of livestock farmers reporting a needlestick injury at some time. This means the farmer may be injected with harmful chemicals.

Signs and Symptoms of needle stick injury

Victims of a needle stick injury usually feel a small, sharp pain at the needle stick point. The needle may stay in the finger, foot or wherever the injury occurred. A small drop of blood may appear.

Management

The recommended action to take is:

  1. Wash the area gently with soap and running tap water as soon as possible. – If not, available you can use hand sanitiser

2. Apply an antiseptic and a clean dressing to the injury area

4. Seek prompt medical advice from your local doctor or hospital emergency department, preferably within 24 hours.

5. Dispose of the needle safely.- In an identified sharps container, or you could put the needle in an empty plastic water bottle for later disposal in a sharp’s container.

Conclusion

While it is unlikely that you will encounter a needle stick injury, it is possible.

If you do, remember:

•            Wash, clean and cover the injury

•            Seek medical aid within 24hrs

•            Dispose of the needle safely and correctly.

This was a very short Article Post. If you found this one interesting, you can check out more here –https://lifesavingfirstaid.com.au/blog/

Well, that’s that. Until next time… Stay safe.

Guide to First Aid for Bites and Stings.

Image of a person watering their flowers in the garden while bees, wasps and ants roam around the garden The title next to it says "Bee’s, Wasps, & Ant bites and stings" followed by Life Saving First Aid logo

Introduction

Australia is crawling with insects of one kind or another. In this article, we will look at first aid for bites and stings from various insects and spiders.

Recognising the Signs, Symptoms and knowing first aid management of insect bites and stings is important.

According to the Australian Institute of Health and Welfare, over 3,500 Australians were hospitalised due to contact with a venomous animal or plants in 2017–18. More than a 26% of these hospitalisations were caused by bee stings, almost 19% were caused by spider bites with redbacks the most common spider involved.

In Australia deaths from venomous plants, animals or insects is rare. The National Coronial Information System records 19 deaths in 2017–18 due to contact with venomous animals – 7 with venomous snakes, 12 with bees and wasps.

Bees, Wasp and Ant bites and stings

Lets’ have a look at bee, wasp and ant stings. Single stings from a bee, wasp or ant, can be painful but rarely cause serious problems except for persons who have a severe allergy to the venom.

However, multiple insect stings can cause severe pain and widespread skin reaction. Multiple stings around the face can cause severe local swelling and difficulty breathing even if the person is not allergic to that insect.

Bees

Here in Australia, there are over 1,500 native bee species in a range of shapes and sizes. Bees are critical to the sustainability of our food supply. An astonishing one-third of Australian food is dependent on honey bee pollination.

Australian native bees can be either solitary or social bees. On the other hand, honey bees will live together in a nest or hive. Honey bees are generally stronger pollinators, but the smaller native bees can access smaller flowers and also play an important role in pollination. 

It is important to remember that bee stings leave behind the venom sac and sting which continues to inject venom into the skin, whilst a wasp or ant may sting multiple times without leaving a venom sac attached.

To remove the bee sting scrape sting out of the skin. Do no try to pull it out as you may squeeze more venom into the casualty.

Wasps

Wasps in Australia include European Wasps, English wasps and paper wasps all of which can sting and inject venom. Unlike a bee, the wasp does not lose its sting and therefore can sting you many times.

Stings from wasps can be immediately extremely painful with some redness around the bite area.

There can also be airway obstruction from swelling of the face and tongue due to anaphylaxis, or from many stings in or around the mouth.

Bull Ants

Bull ants are large, alert ants that can grow up to 40 mm They have characteristic large eyes and long, slender mandibles and a potent venom-loaded sting.

There are about 90 species of bull ants in Australia. Jumper ants are some of the smaller species. They have a habit of aggressively jumping toward intruders.

Ants deliver painful stings by gripping the intruder with their mandibles (jaws), curling their abdomen to reveal the sting, and injecting the victim with venom. Often the ant can deliver multiple stings. 

Signs and Symptoms

Stings from bees, wasps and ants all show similar signs and symptoms

Minor reactions are usually immediate and intense local pain with some local redness and swelling.

On the other hand, more severe reactions can be airway obstruction from swelling of the face and tongue due to anaphylaxis, or from bee stings in or around the mouth. This may occur immediately or over several hours.

Management:

THE major immediate risk to the health of persons bitten or stung by insects is severe allergic reaction, Anaphylaxis.

Prevention, recognition and treatment of anaphylaxis should be the focus of First aid for bites and stings.

For all bites and stings, except in the case of tick bites, apply a cold compress to the sting area. You may be use an icepack to relieve the pain of the sting and help reduce swelling

CALL 000 if multiple stings to the face or tongue have occurred or there is evidence of a severe allergic reaction anaphylaxis.

For anaphylaxis use an Epipen or other adrenaline injector to administer adrenaline (epinephrine) via intramuscular injection preferably into lateral thigh which is the outside part of the upper leg.

Monitor the casualty for any signs of allergic or other reaction

Ticks

Most tick bites cause few or no symptoms. Sometimes ticks may cause local skin irritation or a mild allergic reaction by injecting a toxin.

In susceptible people, a tick bite may cause a severe allergic reaction or anaphylaxis, which can be life threatening.

It may also occur in people with no previous exposure or known susceptibility.

To prevent it from injecting more allergen-containing saliva, do not forcibly remove or touch the tick

This will prevent allergic reactions due to allergen-containing saliva injected by the tick.

The safest way to remove a tick is to Freeze the tick, using a product that rapidly freezes and kills the tick, and allows it to drop off.

Alternatively, leave it in place and seek medical assistance to remove the tick as soon as possible.

If you must remove the tick, use fine tweezers, and grasp the head of the tick as close to the persons skin as possible and lever the tick out by the head. Do not squeeze the tick.

Monitor the casualty for any signs of allergic or other reaction.

Conclusion

The main points for first aid for bites and stings are:

•            There are many insects in Australia that can bite and sting but generally they cause only minor problems

•            Be aware of possible severe allergic reactions and manage accordingly

•            Remove bee stings by scraping them out as soon as possible

•            Apply cold pack to insect bite site for pain management – except for ticks

•            Remove ticks, if possible, by freezing or tweezers applied to the tick’s head. Seek medical attention if you cannot remove the tick.

Well, that’s that. Until next time… Stay safe.

Emergency Response to Bleeding, Blood Loss, and Shock.

Bleeding, blood loss and shock followed by Life Saving First Aid logo

What is bleeding?

Bleeding is when blood discharges from the circulatory system. Blood loss can occur due to small cuts, abrasions, or deep cuts and amputations.

Injuries to the body can also result in internal bleeding, which can range from minor to massive bleeds. Bleeding and blood loss can result in haemorrhagic shock.

There are around 5 litres of blood in the average person. With too much blood loss, the brain doesn’t get enough oxygen to support life. People who experience major injury and trauma may rapidly lose blood.

A loss of only 1.5ltr can result in

  • a rapid heart rate higher than 120 beats per minute.
  • A drop in blood pressure.
  • Increased breathing rate.

You will die if you lose more than 2ltr or about 40 per cent of your blood. Check out this chart- “How much blood can you lose?

There are three main types of Bleeding. Minor, Severe and Internal. It is quite possible you could experience all three types on one casualty.  

Minor Bleeding

For example:

  • from a small surface cut or nosebleed.
  • Capillary bleeding occurs when the skin’s surface layer breaks due to abrasion or a graze. As a result, it will slowly ooze blood and may contain particles.
  • Venous bleeding (a minor wound) is a laceration, cut or slice into the skin bleeding freely. The application of pressure or a bandage will control the bleeding.
  • Minor pain, small cuts, weeping fluid

Severe Bleeding

Severe bleeding:

  • a severe wound due to cut or laceration to an artery. Blood will spurt vigorously with every heartbeat. Requires immediate action as the casualty can lose a large amount of blood quickly.
  • As a result of an embedded object such as a knife, piece of wood or steel.
  • An amputation, that is, a completely severed body part.
  • Severe pain, cold clammy skin, rapid shallow breathing, or other signs of shock.

Internal Bleeding

Internal bleeding is bleeding inside the body. You should always suspect internal bleeding when symptoms of shock are present.

Signs and Symptoms include:

  • Coughing up blood, vomiting blood, bleeding from ears, anus, or blood in the urine.
  • Bruising, pain, tenderness and swelling at the site
  • Swollen, tight abdomen
  • unconsciousness

Management

As with all our First Aid incidents we need to check for danger first to ensure it is safe for us to provide First Aid.

Carry out DRSABCD

Determine the type of bleeding so you can give the appropriate first aid.

Wash your hands and wear personal protective equipment if available.

Nosebleed

Sit casualty upright and tilt their head forward, ask them to squeeze and apply dissect pressure over the soft part of the of the nostrils below the bridge of the nose.

Place a cold pack on the back of their neck.

Hold for at least 10 minutes and if bleeding does not stop within 20 minutes seek medical help.

Minor BleedingManagement

Using pressure on or around the wound is usually the fastest, easiest, and most effective way to stop external bleeding.

The aim is to stop further bleeding while waiting for help to arrive. There is no evidence that elevating a bleeding part will help control bleeding and there is the potential to cause more pain or injury.

If the wound is a graze there may be particles present in the wound. You should remove loose particles with tweezers or by flushing the wound with clean water or sterile saline solution. Do not rub or scrub the wound. If particles are still in the wound apply a bandage which is not too tight and call for medical help.

For a minor or small cut apply firm pressure to the wound using your hand, the casualties’ hand, or a bandage to stop the bleeding. The preferred dressing would be sterile, non-stick, and non-allergenic, . However, use what you have.

Monitor the casualty and seek medical help if needed.

Severe bleedingManagement

If the bleeding is severe or life-threatening, controlling it should take priority over airway and breathing interventions.

You should lie the casualty down, apply pressure on the wound, and send for an ambulance.

Wash your hands and wear PPE if available.

  • Do not remove any embedded object as it may be stopping some bleeding but Bandage around embedded objects to apply indirect pressure to the wound.
  • If there is blood spurting from wound, apply firm direct pressure to the wound with hand or dressing.
  • Apply dressing firmly to the wound, preferably sterile and non-stick
  • In cases where the wound still bleeds through the pad and bandage, remove the bandage, keep the first pad, apply a second pad and rebandage.

If the wound still bleeds through the bandage, remove all bandages and pads, reassess the wound if a bleeding point has been missed, then apply a fresh set of pads and bandages.

If you find the following or similar:

  • An amputated or partially amputated limb above wrist or ankle
  • A victim of a shark attack, propeller cuts or similar major trauma to any part of the body
  • Or bleeding not controlled by local pressure

Call 000 immediately and you should consider the use of a tourniquet. 

Tourniquets

If you cannot control the bleeding by direct pressure or it is life-threatening bleeding from a limb, use an arterial tourniquet.

Do not be apply a tourniquet over a joint or wound.

The following guidelines apply if you need to use a tourniquet:

  • When applying all arterial tourniquets, follow the manufacturer’s instructions (or 5 cm above the wound if no instructions) and tighten until the bleeding stops.
  • If the bleeding does not stop, check the position and application of the tourniquet. If possible, you should not apply the tourniquet over clothing or wetsuits. Apply the tourniquet tightly, even if it causes local discomfort
  • If bleeding continues, a second tourniquet (if available) should be applied to the limb, preferably above the first.
  • Note the time of the tourniquet application, and communicate to emergency/paramedic personnel. the victim will require urgent transfer to the hospital. Until the victim receives specialist care, the tourniquet should not be removed

You can improvise a tourniquet if there is no tourniquet available. Although an improvised tourniquet is unlikely to stop the bleeding and poses the risk of increased bleeding and tissue damage, an improvised tourniquet is better than none at all in life-threatening bleeding.

For example, using materials found in a first aid kit, clothing, or other similarly available items you can improvise a tourniquet. Tighten your Improvised tourniquet by twisting a rod or stick under the improvised tourniquet, similar to the windlass in commercial tourniquets.

You must ensure there is a record of the time your tourniquet was applied. Also, ensure you do not cover the tourniquet with clothing.

Haemostatic Dressing

Another method to help stop severe bleeding is the use of a Haemostatic Dressing.

Haemostatic dressings are filled with agents that help stop bleeding, such as kaolin and chitosan. While commonly used in surgical and military settings, their use in the civilian, non-surgical setting (such as first aid) is becoming more common.

Lie the person down and check for signs of shock and treat.

Internal Bleeding

This occurs when blood escapes from the arteries, veins, or capillaries into tissues or cavities in the body.

Remember, an injured person may be bleeding internally even if you can’t see any blood. An internal injury may cause bleeding that remains contained within the body; for example, within the skull or abdominal cavity.

It is important to ask the right questions to collect the relevant information. Listen carefully to what the person tells you about their injury. Watch for the signs and symptoms of shock. In the case of a head injury, the signs and symptoms of concussion.

The signs and symptoms of internal bleeding depend on where the bleeding is inside the body, but may include:

  • pain at the injured site
  • swollen, tight abdomen
  • nausea and vomiting
  • pale, clammy, sweaty skin
  • breathlessness
  • extreme thirst
  • unconsciousness.

For signs and symptoms specific to concussion (caused by trauma to the head) check out our blog – “Head Injuries”

Management of internal bleeding

First aid cannot realistically manage or treat any kind of internal bleeding. Therefore, seeking prompt medical help is vital.

Above all, severe internal bleeding is life-threatening and requires urgent treatment in hospital so CALL 000

Lie the person down, make them as comfortable as possible and check for signs of shock.

If there is bruising to a limb and no external bleeding, use pressure and a cold pack if available. Above all, make the casualty as comfortable as possible keeping them warm and monitoring their condition till the arrival of the ambulance.

Some things you can do are:

  • Check for danger before approaching the person.
  • If possible, send someone else to call triple zero (000) for an ambulance.
  • Check that the person is conscious.
  • Lie the person down.
  • Cover them with a blanket or something to keep them warm.
  • If possible, raise the person’s legs above the level of their heart.
  • Don’t give the person anything to eat or drink.
  • Offer reassurance. Manage any other injuries, if possible.
  • If the person becomes unconscious, place them on their side. Check for breathing frequently. Begin cardiopulmonary resuscitation (CPR) if necessary.

Conclusion

  • There are three types of bleeding, Minor, Severe and Internal
  • Use PPE if available and apply DRSABCD
  • Call an Ambulance ASAP if needed
  • Apply direct pressure to stop bleeding and use sterile non-stick dressings if available
  • Do not remove embedded objects
  • Be aware of and look for signs of shock
  • Only use a tourniquet as a last resort
  •  For a nosebleed, tilt the head forward, and apply pressure to the bridge of the nose for 10 minutes. If not stopped within 20 min. Call an ambulance.

And always monitor and reassure the casualty.

Well, that’s that. Until next time… Stay safe.

Adrian

Conducting a Risk Assessment for Effective First Aid Preparedness.

cover image saying "first aid risk assessment" followed by Life Saving First Aid logo

Introduction

The ability to conduct a risk assessment for First Aid is critical. DRSABCD is our initial action plan and the first letter is D. D for DANGER.

If you can:

      A. Identify any HAZARDS,

      B. Recognise the RISKS,

And,

     C. Implement control measures,

you can make First Aid, and the spaces you work, live and play in, a lot safer for everyone.

In this article, I am going to explain the difference between a hazard and a risk, discuss how to conduct a risk assessment for first aid and, talk about control measures.

Risk assessment – a step by step process

To help manage risks in the workplace there is a step-by-step process you can follow.

By thinking about what could go wrong and what the consequences could be, you can then do whatever is ‘reasonably practicable ‘ to eliminate or minimise health and safety risks.

What is a hazard?

A hazard is something that poses a threat to life, health, property, or even the environment.

For example, you have a beautiful, inviting, swimming pool in your backyard. It’s a hot day and you want to go for a swim. You stand on the edge of the pool, ready to dive in. There’s just one problem. In the pool is a whopping Great White shark!

However, it’s so hot, you really, REALLY… need to dive in.

In this scenario, the shark is the hazard. A hazard that, should you dive in, poses a threat to your health or even your life.

What is a risk?

A risk is a chance (big or small) that a hazard could hurt or damage someone or something.

In our shark in the pool scenario, it is obvious that if you dived in there is a huge likelihood the shark will attack you and cause major damage to your body.

These are the risks – Torn off limbs. Chunks bitten from your torso. Severe blood loss. Death. ( Maybe it’s not that hot after all? ) Not to mention all that flesh and bone clogging up the pool filter.

So, it follows, understanding the difference between a hazard and a risk is important so you can properly plan your risk management strategy.

Step by step process

This process is known as risk management and involves four steps

1. Identify hazards—find out what could cause harm.

2. Assess risks – if necessary—understand the nature of the harm that could be caused by the hazard, how serious the harm could be and the likelihood of it happening.

3. Control risks – implement the most effective control measure that is reasonably practicable in the circumstances and ensure it is still effective over time.

4. Review – hazards and control measures to ensure they are working as planned

Step 1 – Identify the hazard

By walking around your home or workplace, with a checklist, you can identify any hazards. Don’t forget, A hazard is anything that could cause harm or have a negative impact.

Things like broken or dangerous equipment, a poorly written procedures or bad practices. Staff not well trained for the workplace or equipment. Clutter and rubbish around the home or office, restricting movement and creating a fire hazard. A shark in the pool.

Step 2 – Assess the risks

Now that you have identified the hazard you need to assess the risk of harm or potential harm and also,

•  How likely is it to happen?

•  How serious is the outcome? What are the consequences?

Let’s look at our shark in the pool. What is the potential harm? I listed them above. What’s the probability of it happening? That is, how likely is that to happen? Could be almost certain if you dive in.

Therefore, when you are assessing the risks, you can rate the Probability Question By using:

Unlikely, Possible, Likely and Almost Certain.

Next, how serious are the consequences? These will fall into three categories.

  1. MINOR RISK – unlikely to cause long-term problems so you accept the risk and continue.
  2. MODERATE RISK – where you complete a risk assessment and go ahead if risk is worth  accepting
  3. SIGNIFICANT RISK – this is a risk that needs careful planning and consideration before going ahead. Involving others in decision-making, following policy guidance and practice, and identifying roles and responsibilities.

You can now evaluate the risks even further by combining the PROBABILITY results, with the SEVERITY of the risk.

For example, with our Shark (Hazard) in the pool, you find that it is Unlikely (Probability) you will go for a swim, then it would be of minor consequences (Seriousness), therefore the risk is a Low Priority for management – which is the lowest priority.

On the other end of the scale, if you found that the probability of you diving in is Almost Certain then that is a Significant Risk, with extreme consequences, requiring urgent priority for management.

Consequences for risk management are rated – Low, Moderate, High and Significant.

Step 3 – Control the Risks

Once you have identified the Severity of the risk and the consequences, you need to implement some control measure.

Controls are actions you can take to manage and reduce the risk.

There is a Hierarchy of Control, made up of different levels and control methods for us to follow.

They are

Level 1 – Elimination.

  • That is, remove the hazard.

Level 2 – Substitution,

  • Replace the hazardous item or process.
  • Isolation, separate people from the hazard.
  • Engineering, replace equipment with a more ergonomic style.

Level 3 – Administrative

  • Change procedures or rosters.
  • Use PPE to minimise risk.

Step 4 – Review

Reviewing and ongoing monitoring of the risk or potential harm is needed to ensure it continues to be managed as a low risk.

Throughout this process, you need to be vigilant in scanning and assessing any risk.

This can be done with safety checks, regular WHS inspections, and making it a regular topic at team meetings.

We can put these all together using our example of the shark in the pool.  You found that it was a significant risk with extreme consequences. But, you can use the top level of control here which is the elimination of the risk by removing the shark.  This reduces the risk to low priority, minor consequences, unlikely to happen.

While it sounds like a complicated process it’s not. When you think about it, keeping your first aid activities or workplace safe is just a matter of being vigilant and acting if you see something unsafe or likely to cause harm.

Most businesses and organisations will have a risk assessment matrix which simplifies the risk assessment process to make it easier for you.

Conclusion

The main points to remember are:

• A hazard is something that poses a threat to life, health, property, or even the environment

• A risk is the chance – big or small – that a hazard could hurt or damage someone or something.

• Use a Risk Assessment Matrix to determine the likelihood and consequence of hazards and risks. You can find a free Risk Assessment Matrix here. (Thanks to the Dept. of Education and Training)

Don’t forget to keep your First Aid Certificate current. ( Blog ” How long does a First Aid Certificate last”) This will eliminate the risk of your being an untrained workplace first aider.

Well, that’s that. Until next time… Stay safe.

Adrian

Todays First Aid Apps and Gadgets

image contains the title of the blog "Revolutionizing First Aid with Technology" followed by Life Saving First Aid logo

Introduction to first aid apps and gadgets

Isn’t it wonderful how much technology and todays First Aid Apps and Gadgets have enhanced first-aid response? With developments in intelligent devices and specialised first aid apps, emergency response has become considerably more effective and efficient.

Gone are the days of depending exclusively on a first aid kit and hoping for the best. The use of technology has had a significant influence on saving lives and also provided greater peace of mind in emergencies.

Let’s take a deeper look at how technology has changed the field of first aid response.

Todays First Aid Apps and Gadgets for watches

Let’s begin with smart watches. These little lifesavers are like having your own personal paramedic on your wrist. Heart rate monitoring and fall detection are two features that might warn you of potential health concerns.

They may even summon help or relay your position to first responders in an emergency.

Manufacturers such as Samsung, Apple, and Garmin have transformed the wristwatch into a gadget with capabilities to assist you in an emergency.

The Apple Series 6 wristwatch with first-aid app functions exemplifies exceptional technology. Its Fall Detection feature detects serious falls and automatically sends an emergency alert if the user is unresponsive, ensuring prompt delivery of first-aid during an accident.

In Australia, the Apple Watch app directs emergency notifications to the appropriate authorities such as ambulance, fire, or police depending on the situation. Through GPS and Wi-Fi connectivity, the watch transmits location information and an emergency alarm, enabling emergency workers to respond quickly.

Smartphone Apps and gadgets

Smartphones have advanced and, as a result, apps have been developed for first aid and emergencies. With a few clicks and swipes, you can access first-aid applications that can help you through any situation. These apps function as a virtual first aid responder in your phone, ready to help when you need it most.

They can help with anything from CPR instructions to symptom checklists. Not to mention the plethora of online videos and articles that offer valuable insights and recommendations. In a world where accidents are rampant, having access to this technology should make us all feel safer.

Below are some examples of helpful emergency apps.

some examples of helpful emergency apps. Emergency+ App - The Australian government created this app. It provides emergency contact information and GPS coordinates of their present position. enable emergency responders to locate them more quickly. Red Cross First Aid App - This app walks you through providing first aid and CPR. It also contains emergency contact information and a directory of hospitals and defibrillator sites based on location. In Case of Emergency (ICE) - Designed to store important personal and medical information so emergency services can access it.

Emergency+ App – The Australian government created this app. It provides emergency contact information and GPS coordinates of their present position. enable emergency responders to locate them more quickly.

Red Cross First Aid App – This app walks you through providing first aid and CPR. It also contains emergency contact information and a directory of hospitals and defibrillator sites based on location.

In Case of Emergency (ICE) – Designed to store important personal and medical information so emergency services can access it.

One of Todays First Aid Apps and Gadgets that deserves its own section is GoodSAM.

GoodSAM

A free, global smartphone app that notifies a registered responder of a person in cardiac arrest in their vicinity.

GoodSAM is also linked to the Triple Zero (000) communications centre.

This is how GoodSAM works:

  1. A Triple Zero (000) call starts an alarm and notifies a registered GoodSAM Responder.
  2. The responder is informed of the patient’s position and location of the nearest accessible defibrillator (AED).
  3. The nearest available ambulance is dispatched to the patient. In some areas of Victoria, the fire service is also requested.
  4. The GoodSAM Responder can provide CPR and, if available, use a defibrillator until the arrival of emergency services.

This increases the patient’s chances of survival. It’s a great example of todays first aid apps and gadgets.

This is how GoodSAM works: A Triple Zero (000) call starts an alarm and notifies a registered GoodSAM Responder. The responder is informed of the patient's position and location of the nearest accessible defibrillator (AED). The nearest available ambulance is dispatched to the patient. In some areas of Victoria, the fire service is also requested. The GoodSAM Responder can provide CPR and, if available, use a defibrillator until the arrival of emergency services.

Another fantastic gadget is and AED – Automatic External Defibrillator.

Automated External Defibrillators (AEDs) in First Aid

Portable defibrillators became a reality in the 1960s, however, it would be years before such devices were made available to the general public. There were concerns about entrusting untrained people with equipment emitting hundreds of volts of electrical shock to the heart.

An AED, or Automated External Defibrillator, is helpful in emergencies. It can analyse the heart beat of the casualty.

If it detects an abnormal heart rhythm such as:

  • Fibrillation – where the heart is quivering and therefore not pumping any blood around the body
  • Tachycardia – where the heart is beating extremely fast and can lead to fibrillation

If the AED detects one of these it gives the heart a regulated electrical shock to restore its natural beat.

This gadget is simple to operate, even for persons with no medical background.

Place the pads on the chest, turn on the machine, and follow the voice prompts or on-screen instructions. The device will walk you through the procedure, making it simple and manageable.

Having an AED on hand can give peace of mind in emergencies by providing the possibility to save a life.

If you have never used an AED, you should become acquainted with them. It may come in handy. Look for our first-aid training in your area. Attend a training course for a simple lesson that could help you save a life.

The Importance of Oximeters in First Aid

First Aid Apps and Gadgets include Oximeters. In an emergency, these small devices can swiftly detect the oxygen saturation levels in a person’s blood. Critical information for first responders.

With only a fast clip onto a finger, an oximeter provides healthcare professionals with the knowledge to make decisions. Decisions that might mean the difference between life and death .

Consider the ability to detect harmful drops in oxygen levels before they become life-threatening. It’s like having a guardian angel in your pocket, constantly keeping an eye on you and your loved ones. And, as technology advances, oximeters become ever smaller and more user-friendly, making them available to anybody who requires them.

Conclusion

The use of technology in modern first aid has genuinely changed the discipline, significantly influencing emergency response and patient outcomes.

Smart devices and specialised emergency response applications have made it simpler to deliver the appropriate aid. This could be phoning for assistance or locating the nearest AED.

Medical practitioners are now better able to diagnose and treat patients in real-time. Thanks to the introduction of modern medical equipment, they can give them the correct treatment at the right moment.

This means that where access to medical treatment may be restricted, response times and survival rates have improved significantly. Isolated or rural locations for example.

Todays First Aid Apps and Gadgets that incorporate the latest technology in first aid have been game changers, providing patients with better, more effective care while saving many lives.

What will tomorrow bring?

Until next time this is trainer Nick. Be safe.

First Aid for Children: Essential Tips and Safety Tricks.

Image depicts text that says "First Aid for Children: Tips and Tricks" With an illustration of a child doing play first aid with a teddy bear in her room. Followed by a Life Saving First Aid Logo

First Aid for Children – Introduction

Knowing how to administer first aid to children can be a lifesaver for parents or carers. Accidents can happen at any time and place, and knowing how to react swiftly can make all the difference.

How many children die from injuries? According to the AIHW

“During 2015–2017, injuries contributed to 563 deaths of children aged 0–14—a rate of 4.1 per 100,000 children. The rate of injury deaths for boys (4.9 per 100,000) was 1.5 times as high as that for girls (3.2 per 100,000) (Figure 1).The youngest children (aged 0–4) had the highest rate of injury death (6.1 per 100,000 infants), compared with children aged 5–9 (2.1 per 100,000) and 10–14 (4.1 per 100,000).Injury deaths comprised a substantial proportion of all deaths among those aged 1–14 (33%)”

Approximately 10 deaths per week!

In this article we will go over some of the fundamentals of paediatric first aid. In addition, we will cover some common practices and helpful hints for parents and carers.

We encourage all parents to take first aid classes so that they will be prepared in the event of an emergency.

Common childhood emergencies

Some of the most common emergencies that can require first aid for children include:

1.      Choking: Children may choke on small objects or food, which can cause breathing difficulties and even lead to suffocation.

2.      Cuts and scrapes: Children are often active and can suffer cuts, scrapes, and bruises while playing or exploring.

3.      Burns: Children may accidentally touch hot surfaces or spill hot liquids, resulting in burns or scalds.

4.      Allergic reactions: Children can have allergic reactions to foods, insect bites or stings, or medications, which can cause hives, difficulty breathing, or anaphylaxis.

5.      Poisoning: Children can accidentally ingest harmful substances, such as medications, cleaning products, or chemicals.

6.      Fractures and sprains: Children may suffer fractures or sprains from falls or sports injuries.

7.      Seizures: Seizures can occur in children with epilepsy or other medical conditions and can be scary for the child and those around them.

8.      Nosebleeds: Nosebleeds can happen for various reasons, including dry air, allergies, or trauma to the nose.

It’s essential for parents and caregivers to be prepared for these emergencies and know how to administer first aid to children.

First aid courses

To effectively deal with potential harm or injury to children in Australia, it is recommended that parents or caregivers undertake a nationally accredited course. The most appropriate nationally accredited courses in Australia are.

·        HLTAID009 Provide cardiopulmonary resuscitation (CPR Only).

·        HLTAID011 Provide First Aid.

·        HLTAID012 Provide First Aid in an education and care setting (appropriate for those who work in an education and care setting).

·        Baby First Aid Course (non accredited course, useful information specifically for infant and baby first aid).

These courses include practical instruction on administering First Aid and CPR to children. Because you are administering first aid to children, you should also make other considerations.

Staying calm

This is one of the most important things to remember when faced with an emergency involving a child. When a child is injured, it is essential to remain calm and composed as panic can quickly set in.

Stay calm. Assess the situation accurately and make informed decisions about the necessary first aid.

Panicking can lead to further injuries or mistakes, such as administering incorrect first aid, forgetting to call for professional help (triple 000), or even causing additional distress and harm to the child. By staying calm, your actions reassure the child and those around them.

If a child falls and appears to have hurt their arm, staying calm can help you to assess the situation accurately. You may be able to see if the child is in extreme pain or the arm has a visible deformity. This can help you decide whether seeking medical attention is required.

If the child is crying, staying calm can help you to provide reassurance and comfort while administering appropriate first aid measures, such as applying a cold compress or immobilising the affected area.

So, take a few deep breaths, focus, and always stick to your training. Let’s consider some first aid scenarios specific to children and the best course of action to take.

Considerations

Children are different to adults. Here’s some considerations to make when providing first aid to children.

Observe all age-appropriate techniques outlined in the nationally accredited first aid courses: When administering CPR (Course Code HLTAID009) to an infant, it is suggested to use two fingers for chest compressions, which differs from the technique used for helping an older child or adult.

Comfort and reassurance: During a medical emergency, children may feel scared or experience pain, so it is crucial to provide comfort and ease while administering first aid. This can include holding their hand, using a calm tone, and explaining what you’re doing as you go.

Emotional support: Children may need emotional support following an emergency in addition to physical first aid. You can provide reassurance by holding their hand and validating their feelings by acknowledging how they are feeling. Encouragement is also important, so tell the youngster they’re doing a fantastic job and that they’re courageous. A toy or a tale, for example, might assist in taking their mind off the situation and give a reprieve from any worry or anxiety. Following the administration of first aid, check in with the child to see how they are doing and provide any extra help they may require. Offering emotional support in these ways may make the youngster feel more supported and empowered through a challenging moment.

When administering first aid to a child, obtaining their consent is important. Children should be informed and involved in their healthcare decisions as much as possible.

According to Australian emergency law (https://australianemergencylaw.com/) a child can consent to receiving first aid care provided they understand fully what the first aider is saying. Therefore it’s important to explain to the child what you’re going to do. Get consent before proceeding with any first aid. This can build trust between the child and caregiver and help the child feel more in control of the situation.

If the child is unconscious or unable to consent, the first aider should act in the casualties’ best interests and within the limits of their training. Where the first aider is also the caregiver, day-care worker for example,  the caregiver must make an informed decision about what actions to take based on the situation and the child’s medical history. For example, if a child is having an allergic reaction and is unconscious, and breathing, it’s appropriate for the first aider to administer an epinephrine auto-injector as it could potentially save the child’s life.

It’s also important to note that a child’s consent is not always necessary in emergencies where the caregiver must act quickly to prevent further harm. In these cases, caregivers must act in the child’s best interest to provide the necessary care.

Allergies and Medical conditions

Consideration of allergies and medical conditions:

When providing first aid to children, it is vital to consider any allergies or medical conditions they may have. Because allergic reactions can be life-threatening, carers must be aware of the child’s sensitivity and take appropriate precautions. For example, if you know that a child is allergic to latex, you can use gloves that are latex-free.

It is also crucial to be aware of any pre-existing medical difficulties the child may have had. When delivering first aid, caregivers should be mindful of the child’s medical history and any potential risks. A child with a heart condition may have contraindications to specific therapies or medications.

Conclusion

Finally, providing first aid to children necessitates unique considerations and procedures. There are various crucial tips and methods that help you provide safe and effective care.

These include:

  • communicating effectively
  • offering emotional support
  • being aware of possible hazards and taking required safeguards
  • stay calm and respond swiftly
  • prioritising the child’s well-being
  • getting expert medical assistance when necessary

By following these tips, we can ensure that our children receive the greatest possible care and support during times of need.

Remember that knowing how to offer first aid to children can be a life-saving skill that can make all the difference in an emergency.

Until next time this is trainer Nick. Be safe