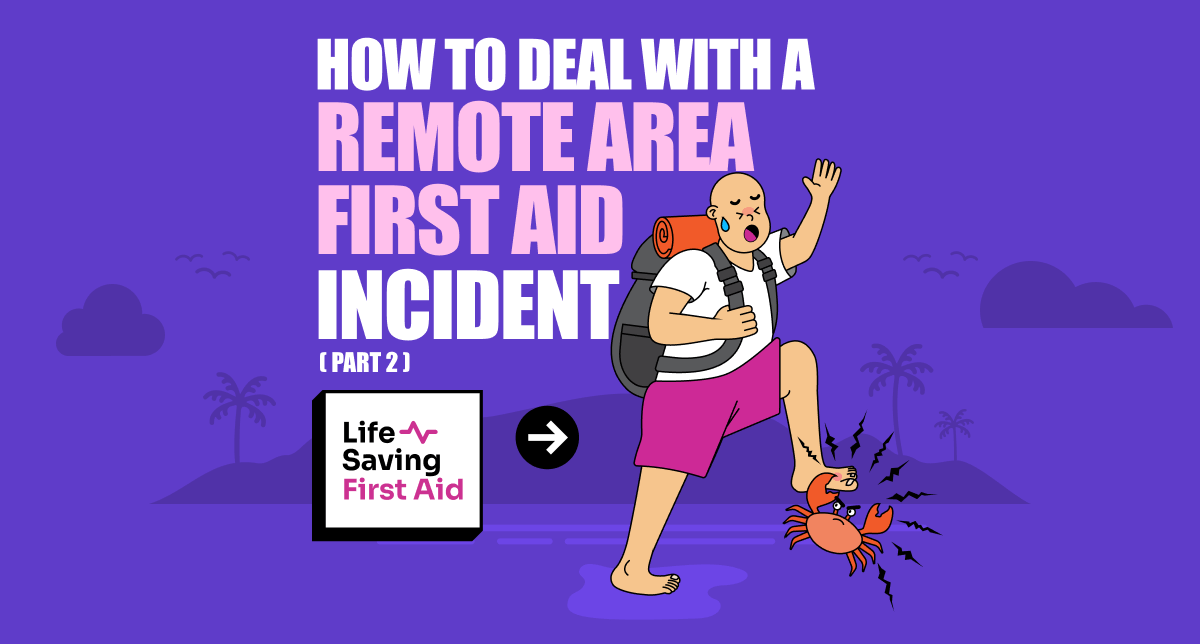
Introduction
In part one of Remote Area First Aid, we looked at the preparation and some of the considerations associated with it. But you would know that because you’ve read it. If you haven’t then you should.
This time we are going to look at how you, as a first aider can deal with a remote area first aid incident.
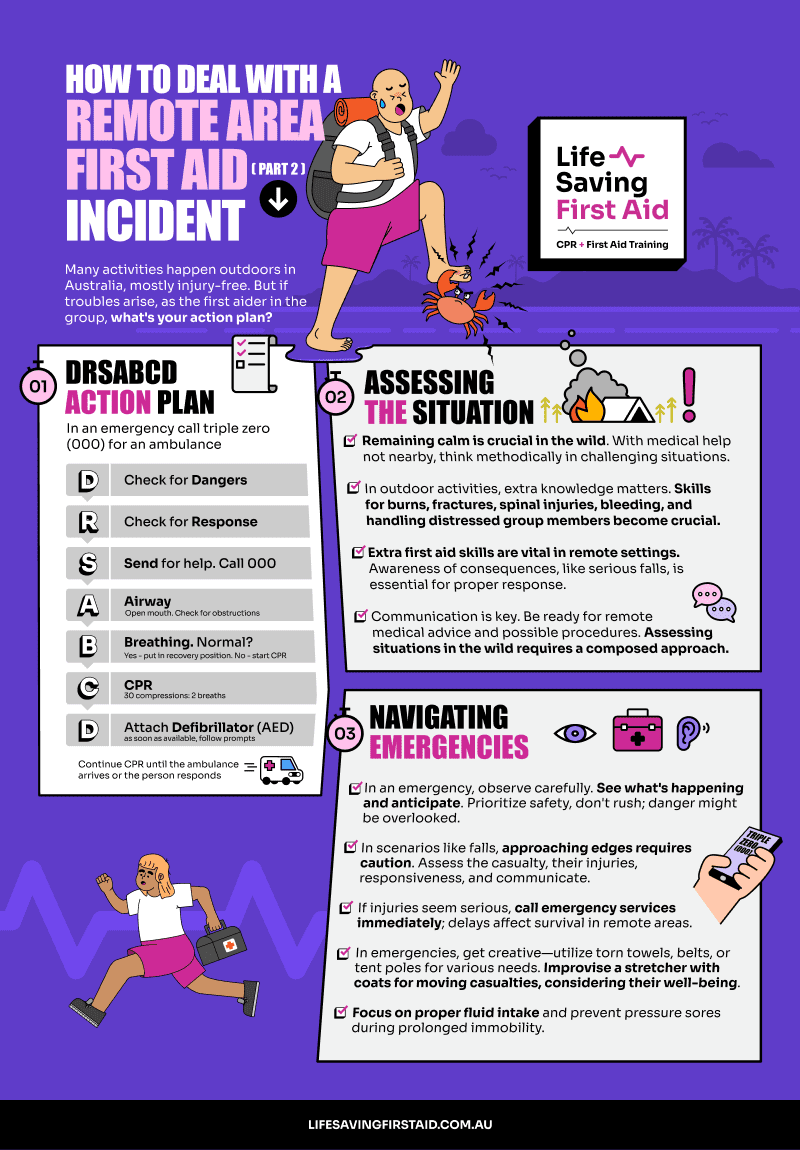
There are heaps of diverse adventurous activities undertaken in the Great Australian Outdoors. Most occur incident-free with everyone returning home uninjured. (Perhaps a little sunburnt. But that’s another blog…)
Regardless of the activity, if it goes pear-shaped, the injuries sustained will be similar. Broken this, bruised that, punctured thingummy, or slashed whatsit.
AND, If you are the first aider in the group, YOU will most likely be called upon to answer the question on everyone’s lips – “What are we going to do”?
What are you going to do?
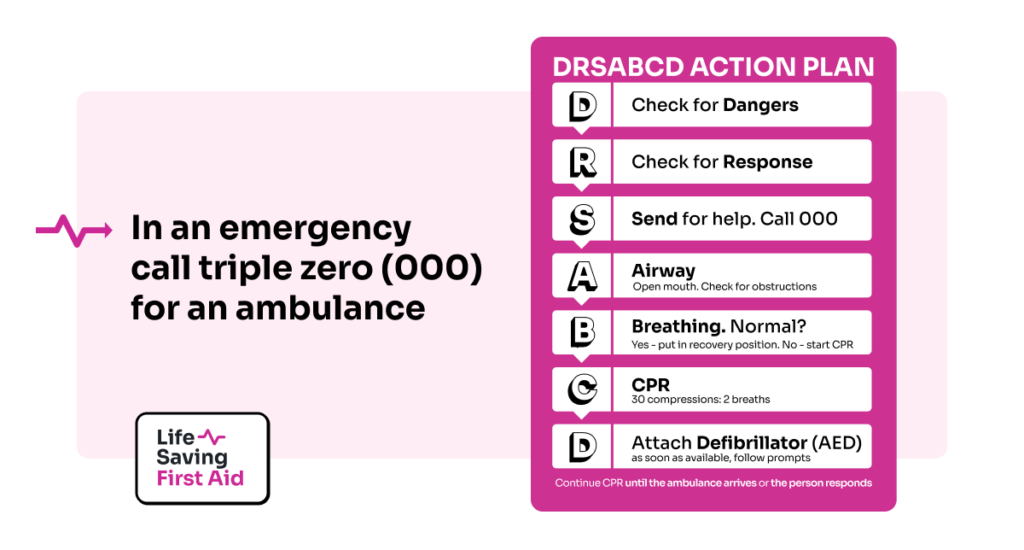
Don’t forget the basics. The initial action plan of DRSABCD:
- Danger
- Response
- Send for help
- Airways
- Breathing
- CPR
- Defibrillator
is just as valid in a remote area as it is in the suburbs.
In fact, using this initial action plan should short-circuit the panic impulse. Because it is a checklist plan with a set of actions to complete, as you work through it concentrating on each task, the urge to panic will be reduced. Handy.
Assessing the situation
You need to remain calm and act methodically. Medical assistance is probably not just around the corner.
A remote setting requires some extra first aid skills and a better understanding of actions and consequences.
For example:
- Action – casualty has fallen from approx. 5 metres.
- Consequences – What are the Consequences? You need to know that a fall from any height above 1.2 metres can cause serious injuries including spinal injuries, head injuries or even death. And falls above 30m or higher are almost 100% fatal. (Check this out: “… lost his footing on an unsecured wooden plank and fell approximately two metres through the gap to the concrete floor below. The worker was taken to hospital with head injuries and later died.” This is from The Australian Institute of Health & Safety)
So, if you are out bushwalking on mountainous or coastal cliff trails this type of extra knowledge would be very useful…
And the extra first aid skills? For this example, the know-how to deal with multiple serious fractures, spinal injury, internal bleeding, and serious head injury. Add a couple of panicking, distressed group members, just to stretch you a bit thinner…
To top it off, if you have communication with medical advice, you may even be required to carry out a medical procedure you are not trained for under the guidance of a doctor on the other end of the phone!
But hey… No pressure. It’s about now that you wished you had stayed home and watched the footy.
Back to assessing the situation.
OBSERVATION
Look at the situation. SEE what’s happened, work out what’s happening, and what could happen next.
Remember, your safety and the safety of the others in the group are paramount! Don’t rush to assist the casualty. You could miss recognising a dangerous situation.
In our example above with a fall, you may have to approach the edge of a drop-off. You may need to use a rope to secure you from falling. Can you see the casualty? Are there any obvious injuries? Can they talk to you? Are they responsive?
Contact emergency services ASAP If you think their injuries are serious. This could mean calling on the phone or sending other members of the group out to get help.
In a remote first aid situation, any delay in organising medical assistance may affect the casualty’s chance of survival.
ACTION
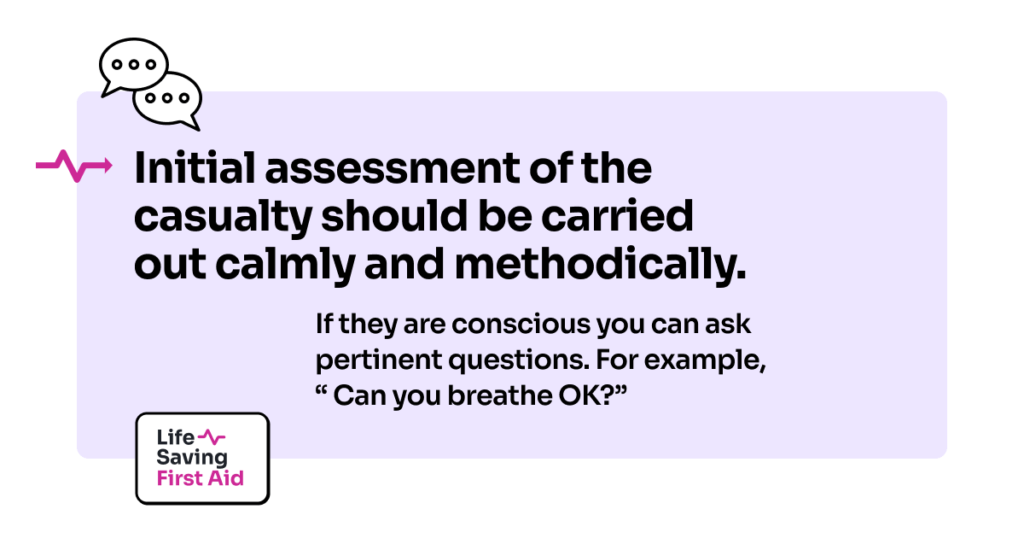
Initial assessment of the casualty should be carried out calmly and methodically. If they are conscious you can ask pertinent questions.
For example, “ Can you breathe OK?” Ask them to take a deep breath. Watch for signs of any discomfort.
If they cannot breathe effectively then examine their chest for any injuries.
Broken ribs from falls are common. Ribs enclose the heart, lungs, and other vital organs. Any severe chest trauma may cause life-threatening injuries to these organs. Broken ribs do not require compression bandaging. Look for signs of internal bleeding.
Make the casualty as comfortable as possible and monitor their condition.
Remember if they are unconscious and breathing, place them in the recovery position even if you suspect a spine or neck injury.
Bleeding
Severe, life-threatening bleeding must be stopped as soon as possible. Apply dressings and bandages as a priority. For profuse arterial bleeding, you may need to apply a tourniquet.
Monitor the bleeding and replace dressings if blood soaks through.
Head and Neck
Head and neck injuries should be suspected when impact injuries have occurred – Falls, aggression, hit in the head etc.
Stabilise the head and neck as soon as possible – use your hands or packing around the head and neck. You may have to deal with life-threatening issues first. Severe bleeding and breathing problems for example.
Head-to-Toe Assessment
Do a head-to-toe assessment as soon as the casualty is stabilised. Check the casualty’s body for broken bones, and severe bleeding. Deal with minor injuries, minor bleeding and non-bleeding wounds later.
History
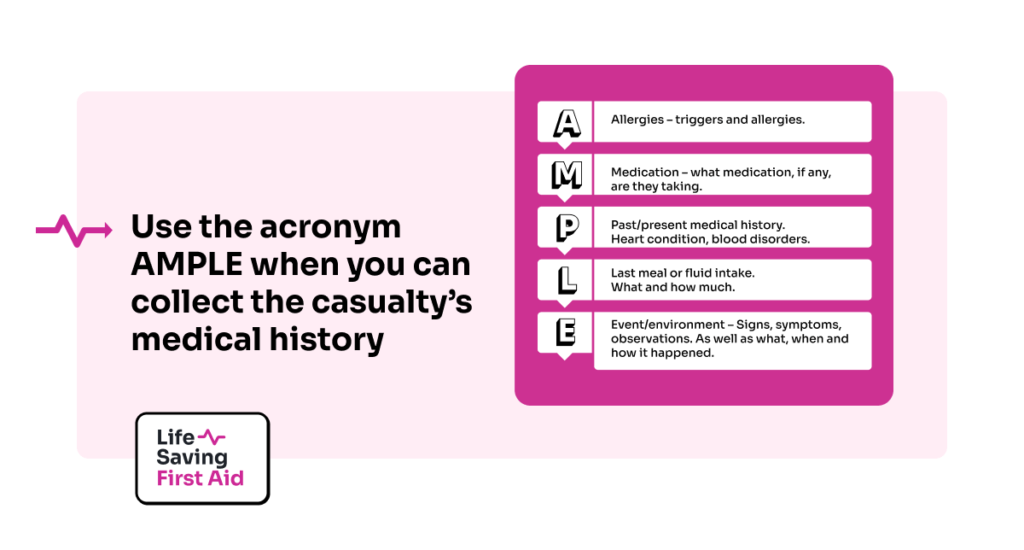
History of the incident includes what has happened as well as details of the medical history of the casualty. Existing medical conditions, required medications, allergies suffered etc. can be ascertained after any life-threatening injuries have been managed.
Use the acronym AMPLE when you can collect the casualty’s medical history.
- Allergies – triggers and allergies.
- Medication – what medication, if any, are they taking.
- Past/present medical history – heart condition, blood disorders.
- Last meal or fluid intake – what and how much.
- Event/environment – Signs, symptoms, observations. As well as what, when and how it happened.
Ongoing Care
Make the casualty as comfortable as possible. Relocate them to your campsite if you can. Or you can build your campsite around them.
If in a hot region, adequate shade, and water during the day. Warmth during the night. Cold, keep warm and dry. Watch for signs of Hyperthermia and Hypothermia.
Remember, you may be some distance or time from assistance. This means you will have to care for the casualty for some time before this help arrives. Also, the type of injury will determine the care required.
A broken leg although potentially very serious will not require the same type of treatment and care as severe life-threatening bleeding.
You could be there for some time and there are no guarantees the casualty’s condition will improve. They could get worse. A lot worse.
Make sure you conduct a thorough check on them regularly – say every 15 minutes for serious injuries to every hour for less serious. Record all your observations.
Look at their:
- Conscious State – Very conscious, in and out.
- Pulse and breathing rate – within normal limits or otherwise.
- Temperature – Normal? High? Low?
- Eyes – check pupils. Reaction to light, sizes, dilated or contracted.
- Skin for condition and colour – Wet, cold, hot. Normal or bluish.
- Headache
- Slurred speech
- Pain level
- Fluid intake and output – measure using a cup or empty tin can (this is especially important if they are vomiting or have diarrhoea).
By making these observations and recording them you will identify any changes and be able to respond to them quickly. This may make a life-or-death difference to your casualty.
Infection
Correct wound management is essential in remote area first aid.
- Clean wounds with an antiseptic solution and gently remove as much dirt and debris as possible.
- Keep the dressings as dry as possible.
- Change dressings as required. If blood soaks through or they get wet, for example
- Check circulation on bandaged limbs.
- Check splint bandages for firmness.
You don’t want to add to your problems through the infection of a superficial wound. Especially if medical help is some time away.
General Considerations
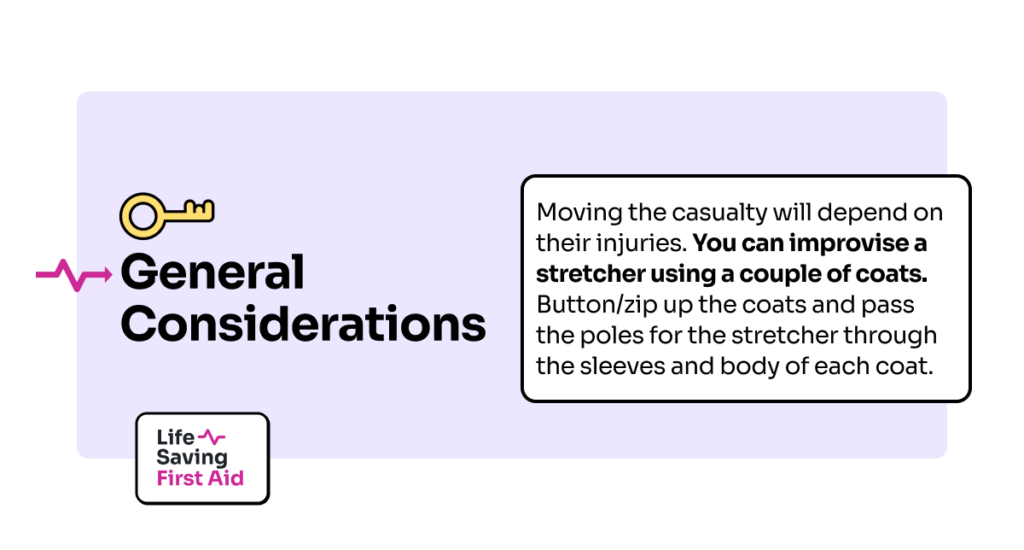
You may have to improvise:
- Torn-up towels, sheets or shirts can be used for extra dressings.
- Shoelaces, belts, or rope can be used to attach splints.
- Tentpoles or bits of wood can be used for splints.
- Plastic bag, bucket, water bottle for immobilised casualty toilet.
For immobile casualties, going to the toilet is a problem you will face. Use what’s available to collect their bowel movements and urine and ensure handwashing/sanitising protocols are strictly followed.
Moving the casualty will depend on their injuries. You can improvise a stretcher using a couple of coats. Button/zip up the coats and pass the poles for the stretcher through the sleeves and body of each coat.
You will need to decide on any movement of the casualty. What’s best for them is the priority.
Fluids. Frequent small amounts of water is the best method. If you have some electrolyte powder, or similar, you can add it to the water.
Increase the casualty’s water intake if the casualty has diarrhoea.
Be mindful that if the casualty has serious injuries requiring surgery stop giving them water 4 to 6 hours before their surgery.
And, if you’re thinking that’s enough, wait there’s more!
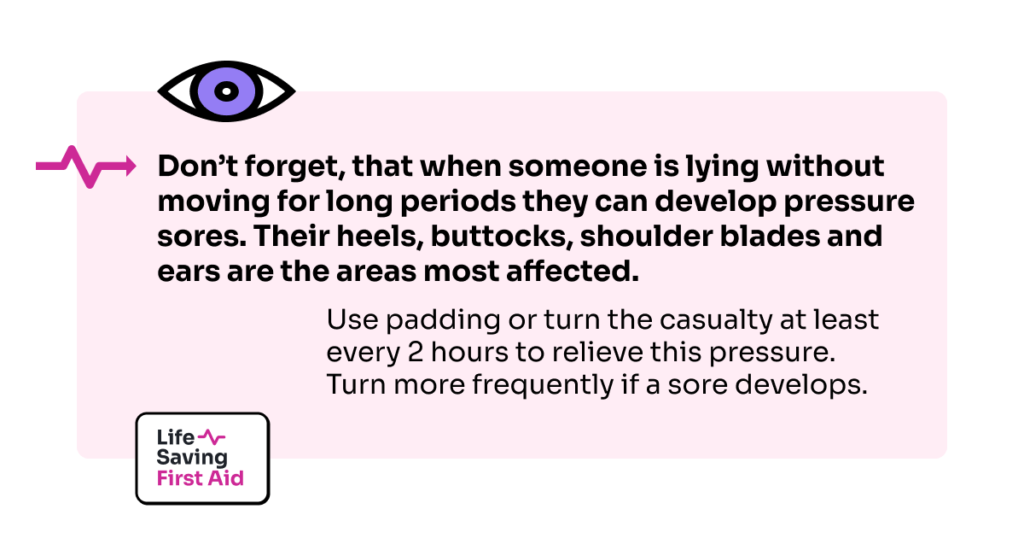
Don’t forget, that when someone is lying without moving for long periods they can develop pressure sores. Their heels, buttocks, shoulder blades and ears are the areas most affected.
These sores are caused when blood circulation is reduced to the skin in those areas remaining in contact with a hard surface such as the ground.
Use padding or turn the casualty at least every 2 hours to relieve this pressure. Turn more frequently if a sore develops.
Conclusion
There’s a lot in Remote Area First Aid. The preparation before you go (Remote First Aid Part 1). The responsibility as a first aider should anything happen considering the distance/time away from medical help. The extra gear you have to carry (Remote First Aid Part 3).
In Part 3 of our Remote Area First Aid article, I will offer some suggestions for the contents of a first aid kit, and how to stay in contact while you are away.
Well, that’s that. Until next time… Stay safe.