First Aid for Snake Bites: Signs & Treatment

First Aid for Snake Bites

Australia is home to some of the most venomous snakes in the world, including the Eastern Brown, Tiger Snake, and Inland Taipan. Knowing how to respond to a snake bite could mean the difference between life and death. Whether you’re exploring the bush, working outdoors, or simply enjoying your backyard, being prepared is essential.

Snake bites can cause severe symptoms within minutes, making immediate first aid critical while waiting for professional medical help. Understanding the signs and the correct treatment steps ensures you’re ready to act quickly in an emergency. Preparation and knowledge empower you to stay calm and provide potentially life-saving care when it matters most.

Recognising a Snake Bite: What Does It Look Like?

When faced with a suspected snake bite, you may wonder, what does a snake bite look like? The visual signs can vary depending on the snake and whether the bite is venomous or non-venomous.

Venomous snake bites often leave two distinct puncture marks where the fangs penetrated the skin. These may be accompanied by redness, swelling, bruising, or even slight bleeding. Over time, symptoms like pain, spreading discolouration, or a feeling of tightness around the bite site can develop.

Non-venomous snake bites, on the other hand, tend to display multiple small teeth marks in a more superficial pattern, with less swelling or bleeding. However, it’s critical not to assume a bite is harmless, as venom delivery isn’t always obvious.

In Australia, where venomous species are common, any snake bite must be treated as potentially life-threatening until proven otherwise. The body’s reaction to venom can escalate quickly, so identifying the bite and acting immediately can be lifesaving. If you’re unsure what the bite looks like, always look for puncture marks and monitor for swelling, pain, or discoloration spreading from the area.

Common Snake Bite Symptoms

Recognising snake bite symptoms early is crucial for effective treatment, as the severity of reactions can escalate rapidly. Symptoms can range from mild to severe depending on the snake species, the amount of venom injected, and the victim’s response. According to Heath Direct some of the early and then Developed symptoms are.

Early symptoms

  • Localised pain or a burning sensation around the bite site.
  • Swelling, redness, or bruising spreading from the bite.
  • Sweating.
  • Tingling or numbness in the limbs or face.

If venom spreads further, severe snake bite symptoms can develop:

  • Difficulty breathing due to respiratory paralysis.
  • Nausea, or vomiting
  • Weakness, dizziness, or collapse.
  • Blurred vision or drooping eyelids.
  • Paralysis starting at the bite site and spreading.
  • Unconsciousness in extreme cases.

In Australia, symptoms can vary based on the species. For example, bites from Brown Snakes may cause rapid clotting issues and collapse, while Tiger Snakes often cause severe pain, sweating, and muscle paralysis. Red-bellied Black Snakes typically result in less severe systemic effects but still cause swelling and discomfort.

Regardless of the species, any snake bite symptoms should be treated as a medical emergency. Immediate first aid and professional care are vital to prevent life-threatening complications.

How to Bandage a Snake Bite: Pressure Immobilisation Technique (PIT)

If resuscitation is required, it takes precedence over applying the Pressure Immobilisation Technique (PIT). However, once resuscitation is underway, PIT should be applied as soon as possible to slow venom movement.

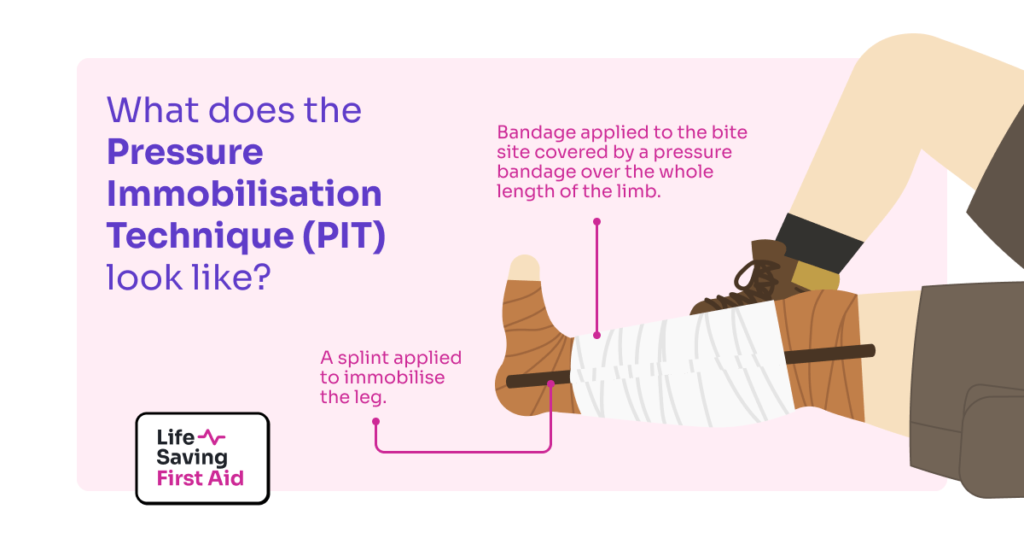
How to Apply PIT on a Limb:

  1. Apply a Pressure Bandage Over the Bite Site:
    • Use a broad elasticised bandage (10–15 cm wide) if available. If not, crepe bandages, clothing, or other material can be used.
    • The bandage should be firm and tight—you should not be able to slide a finger easily between the bandage and skin.
  2. Restrict Lymphatic Flow and Immobilise:
    • Begin wrapping a second pressure bandage at the fingers or toes and extend upwards, covering as much of the limb as possible.
    • Apply the bandage over existing clothing if possible.
    • Alternatively, a single bandage can be applied starting at the fingers or toes and extending upward, including the bite site.
  3. Splint the Limb:
    • Splint the limb, ensuring joints on both sides of the bite are immobilised.
    • Incorporate the splint under the bandage layers if practical.
    • For arm bites, place the limb in a sling.
  4. Keep the Victim Still:
    • Bring transport to the victim whenever possible.
    • If alone, the victim should apply the bandage, remain as immobile as possible, and seek urgent help.

If the Bite Is Not on a Limb:

Apply firm direct pressure to the bite site without restricting breathing, or chest movement however you must not apply firm pressure to the neck, or head.
Medical Treatment for Snake Bites

Once professional medical help is sought, snake bite treatment begins with a thorough assessment and the implementation of critical protocols to manage the situation effectively. Rapid hospitalisation is essential, as delays can lead to worsening symptoms and life-threatening complications.

In hospital, medical staff will:

  1. Assess the bite and symptoms: The team will monitor vital signs, including blood pressure, heart rate, and breathing. Blood tests may be conducted to determine the severity of envenomation and identify the snake species.
  2. Administer antivenom: If symptoms indicate venom spread, antivenom is provided to neutralise toxins. The choice of antivenom depends on the type of snake, which can sometimes be determined through symptoms or identification. This treatment requires careful monitoring to manage potential allergic reactions.
  3. Manage pain and complications: Pain relief, intravenous fluids, and medications to control nausea or bleeding may be administered. In severe cases, life support measures like oxygen therapy or ventilation are provided.
  4. Continuous monitoring: Patients are closely observed for several hours or even days to ensure symptoms are stabilising. Blood clotting, paralysis progression, and vital organ function are carefully tracked.

Snake bite treatment focuses on immediate stabilisation, venom neutralisation, and managing symptoms. The quicker the patient reaches a hospital, the better the chances of a full recovery.

How to Prevent Snake Bites

Preventing snake bites begins with awareness and caution, whether you’re in urban gardens or rural bushland. Follow these tips to stay safe:

  • Wear protective clothing: When walking or working in snake-prone areas, wear long pants, thick socks, and sturdy boots to reduce exposure.
  • Stay on clear paths: Avoid tall grass, leaf piles, and rocks where snakes may hide. Use a stick to check areas ahead when walking in dense vegetation.
  • Be cautious around water: Snakes often gather near creeks, ponds, and dams, especially during warm weather.
  • Keep your surroundings clean: Clear debris, woodpiles, and overgrown areas near your home to reduce hiding spots.
  • Use lights at night: Carry a torch to spot snakes in the dark.

By respecting snakes’ habitats and taking simple precautions, you can significantly reduce the risk of snake bites.

Conclusion: Quick Action Saves Lives

Recognising snake bite symptoms and administering immediate first aid can make a life-saving difference. Acting quickly with the Pressure Immobilisation Technique (PIT) and seeking professional medical help ensures the best chance of recovery.

Whether you’re exploring the bush, working outdoors, or enjoying your backyard, being prepared is essential. Carry a first aid kit and stay informed about proper snake bite treatment.

Stay Prepared – Learn Life Saving First Aid

Being prepared for emergencies, such as snake bites, starts with the right knowledge and training. By completing a first aid course, you’ll gain the confidence and skills to handle snake bites, administer effective first aid, and respond to life-threatening situations calmly and efficiently.

At Life Saving First Aid, we equip you with practical, hands-on training to prepare you for real-world emergencies. Whether you spend time outdoors or simply want to protect those around you, learning first aid is a proactive step toward saving lives.

Act today – contact us to book your first aid course and be ready for any emergency.
Rips and undertows. How to reduce the dangers of drowning.

Rips and undertows

Introduction

This island, Australia, is surrounded by oceans and seas, and there is no better way to beat the summer heat than going swimming in cool, refreshing water. But, as my good friend Publilius warns us, “Fear cannot restrain when pleasure invites.” Too often the pleasure of the swim will override any fear of the hazards, drowning risks, and danger.

According to the Royal Life Saving National Drowning Report 2022, 339 people drowned in Australian waterways from July 2021 to June 2022.

Around 21% of these drownings were at the beach.

At the beach

How good is it when you find that remote stretch of beach with no one else in sight?

Gear off! ( if you’re game…), run down the beach and dive into the welcome relief.

Aaaahmazing!

There is a downside, however. When swimming in the ocean we need to be aware of the potential hazards, such as rip currents, undertows, and shallow water.

Rip currents can be dangerous and can pull swimmers out to sea, making it difficult to return to shore.

Diving into shallow water can result in head, neck, or spine injuries.

All of these expose you to the danger of drowning.

What is a Rip Current and how are they identified?

So… You’re on a remote beach. Alone. Being pulled out to sea by a rip current you had no clue was there… No one to help and no idea what to do.

This sure could ruin your day…

Understanding these ocean currents and how to recognise them will help you avoid them or, escape from their pull if caught in one.

A rip current is a narrow, fast-moving channel of water that flows away from the shore.

These currents can be difficult to spot, but they are often found near the beach in areas with breaking waves, such as near sandbars or jetties.

You should spend a few minutes studying the water before jumping in.

Look for:

  • Dark-coloured water which looks deeper with less or no breaking waves.
  • Brown water with foam on its surface out beyond the breaking waves.
  • Rippled water with debris floating out to sea.

Sometimes it can be easier to look for where the waves are breaking consistently, and then look to each side where they don’t break consistently. Those areas are rip currents.

Caught in a rip? What should you do?

It’s important to stay calm, conserve your energy and not panic. If you panic you will be unable to

  1. think clearly,

    and
  2. control your actions.

This will reduce the danger of drowning.

Signal for help by raising one arm and calling out to attract attention.

Float on your back and float with the rip – it may carry you back to shore.

Wait to be rescued.

If you are a strong swimmer and not tired, try to swim parallel to the shore or towards the breaking waves to return to shore.

Never try to swim against the rip, you will only get tired and exhaust yourself.

Avoid getting caught in a rip and reduce the danger of drowning.

The best way to avoid a rip is to swim on a patrolled beach, between the flags.

Look for flags or signs that indicate the presence of rip currents.

Avoid swimming near sandbars or jetties.

Undertows

Undertows are similar to rip currents, but they occur along the shore caused by large waves or swells. It will not pull you offshore into deep water.

Undertow is typically only dangerous for small children who can’t walk up the beach face against the strong backwash flow.

What makes them different, and more dangerous than a rip, is that these currents can pull swimmers under the water, making it difficult to surface for air.

To avoid getting caught in an undertow, swim on a patrolled beach between the flags, and avoid swimming in areas with large waves or swells.

If you can’t swim to safety, try to signal for help by waving your arms or shouting.

It’s also important to be aware of the ocean conditions such as the weather, the tide, and the waves. High tide, stormy weather or big waves can make swimming more dangerous. It’s always best to follow the advice of the lifeguards and to stay within the designated swimming areas.

Remember, do not swim alone.

A person who is caught by a rip, or undertow may become exhausted and unable to swim or keep themselves afloat any longer. There is a real danger they may drown.

If no one is watching….

Shallow Water

There are a number of ways to sustain head or spinal cord injuries by diving into shallow water. The severity of the head injury or disability depends on the impact and or level of the spinal cord where the damage occurs.

Head injuries can occur when the head impacts rocks, the ocean floor, surfboards, or even other swimmers.

It is possible to damage the spinal cord by:

  • Vertical compression –  where the spine is compressed due to vertical impact with the ocean floor, or other objects, fracturing the spine and damaging the spinal cord.
  • Hyperflexion –  When the head contacts the ocean floor, and the neck is pushed forward beyond its limits. This can tear ligaments, and damage the spine and spinal cord.
  • Hyperextension -These injuries may result from facial or frontal trauma, where the head and neck are forced backwards, damaging ligaments, the spine, and the spinal cord.
  • Rotational injury – where the spine is twisted beyond its limits when the body is tossed around in turbulent shallow water. This can damage the spine and the spinal cord.

Here are a couple of things you can do to prevent head, neck, and spinal injuries at the beach:

  1. DO NOT DIVE into waves or water along the shoreline.
  2. Enter the water feet first.
  3. Swim between the flags on a patrolled beach.

A person who suffers a spinal injury in the water may not be able to swim, float or signal for help.

Once again, if no one is watching, the most likely outcome for them is drowning.

Drowning

If you suspect someone is drowning act quickly and, without putting yourself in danger,  get them to safety as soon as possible.

Call for help, whether that’s by shouting for a lifeguard or dialling emergency services.

If the person is unconscious and not breathing, roll them onto their side and open their mouth to drain out any water.

Perform CPR. This can keep oxygen flowing to the brain and other vital organs, which can help to prevent permanent damage or death.

To perform CPR, you will need to:

  • Position the person on their back on a firm surface,
  • Perform 30 chest compressions. Pushing down one-third of their chest cavity to compress their heart.
  • Tilt their head back slightly and pinch their nose shut
  • Open their mouth and give two full breaths

Keep going until the person begins to breathe on their own, or until emergency medical services arrive

In summary

We live on an island and most, if not all of us love going to the beach. And we have plenty of beach. According to Geoscience Australia, Australia’s coastline stretches for approximately 34,000 kilometres. And around 50% of us live within seven kilometres of the coast.

Remember, never swim alone, always swim at a patrolled beach between the flags (AS IF! Yeah I know – But you should.) and be aware of the potential hazards such as rip currents, undertows, and shallow water.

If you suspect someone is drowning, it’s important to act quickly and get them to safety as soon as possible, call for help and perform CPR if necessary.

Well, that’s that. Until next time… Stay safe.

Adrian

First Aid Training in Hawthorn East.

First Aid Training in Hawthorn East

In the words of my very good friend, Publilius Syrus, the Roman philosopher –  “It is hard to recover the lost opportunity.” Hence First Aid Training in Hawthorn East.

We at Life Saving First Aid recognised what a great opportunity has been presented to us due to the unprecedented demand for first aid training in Melbourne’s east.  

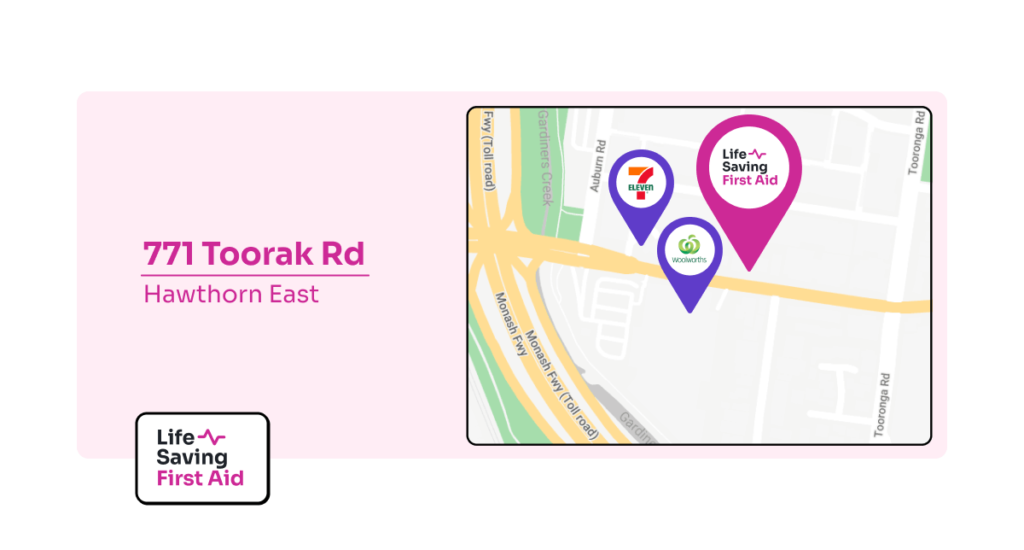
We acted quickly and opened a new First Aid training facility at 771 Toorak Rd Hawthorn East.

First Aid training in CPR, Provide First Aid (which includes CPR), Provide First Aid in an Educational and Care Setting ( also includes CPR), and Conduct Manual Tasks Safely is now available at this venue 7 days a week!

Life Saving First Aids’ new training facility falls in step with our mission statement:

What’s in it for you?

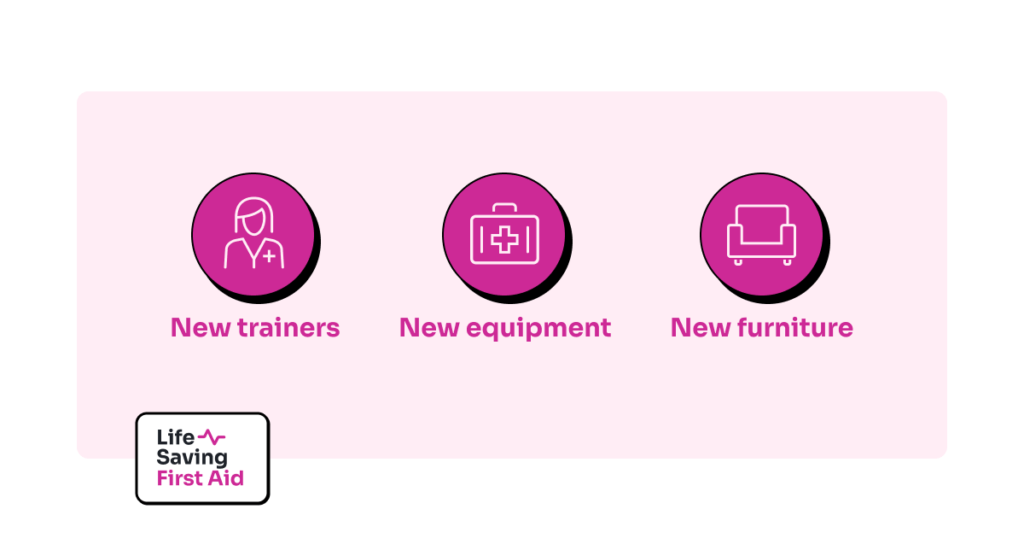
We have recruited new trainers, sourced new equipment, and bought new furniture to provide the best facilities possible.

The spacious First Aid training area allows ample room to comfortably accommodate up to 15 students at a time.

The building has a small waiting area and a café nearby for those who arrive early.

There is ample parking across the road in the Woolies car park, all-day parking on Toorak road, and 2 hr roadside parking in nearby side streets.

Our Community

And there are plenty of local businesses that will be able to access and benefit from our new facility.

Centres such as Guardian, Noahs Ark, Auburn Preschool, Samantha’s Child Care, Camberwell Family Day-care and Montessori Beginnings, to name just a few, are all within 6 minutes.

Bounce Glen Iris, Harold Holt Swim Centre, Kooyong Lawn Tennis club and other sporting clubs are also nearby.

We are committed to serving our community and making a positive impact. That’s why we are proud to partner with local organizations and offer group discounts and customised training programs to fit the needs of businesses and organizations in the area.

I hope you are picking up that we here at Life Saving First Aid are extremely excited about our new training facility! 

We are looking forward to providing our “best reviewed” (according to Google) First Aid training to our public clients as well as local businesses.

What makes us a great first Aid training provider?

I think it is a number of things.

  • We are Melbourne based. We’re Local!
  • We provide a personalised business and sales manager.  Should you need to contact us you will speak to the same person every time.
  • There’s a dedicated student support representative and a full-time office and sales assistant.  
  • We offer courses seven days a week. Very convenient for you.
  • Simple to use online booking system…Choose a day and time and course that suits you.
  • Blended learning. Online First Aid training theory to complete in your own time. In-classroom practical assessment.
  • We also communicate regularly with our clients.

What more could you ask for regarding First Aid Training?

Nothing.  

If you live or work in Melbourne’s East and need first aid training it’s all there for you at 771 Toorak Rd Hawthorn East!

Well, that’s that. Until next time…. Stay safe

Adrian

Stroke

Different strokes for different folks

Different strokes for different folks.

While that statement is a bit tongue-in-cheek, when it comes to people who suffer from a stroke, it is accurate. Read on and you will see there are different types of stroke and they can affect the casualty in different ways. Different strokes for different folks

Introduction

Cardiovascular Disease (CVD) is a broad term for many conditions which affect the heart and blood vessels.  Coronary heart disease,  heart failure, and stroke are the most common.

In this blog, we are going to talk about strokes. What they are, what you can do to help someone who is experiencing a stroke, and some actions you can take to help prevent a stroke – maybe even help with preventing CVD.

According to the Australian Institute of Health and Welfare ( AIHW ) in 2019, there was an estimated 67,000 hospitalisations for stroke of those, sadly 8,382 died as a result.

Many were left with permanent physical damage.

According to the Australian Institute of Health and Welfare ( AIHW ) in 2019, there was an estimated 67,000 hospitalisations for stroke of those, sadly 8,382 died as a result.

And the cost to the community? Once again from the AIHW:

 “ In 2018–19, the estimated health system expenditure on stroke was more than $660 million. The greatest cost was for public hospital-admitted patient services ($364.2 million) followed by private hospital services”

More than 660 million dollars…

The Brain

You are probably aware that the brain is divided in half and each half is divided into other areas.

The left half of the brain – the left hemisphere –  controls most functions on the right side of the body, while the right half of the brain  -the right hemisphere –  controls most functions on the left side.

The different areas control different functions of your body. How you move – walking, standing, holding etc, your senses – touch, sight or smell etc., speech and how you think.

Because different arteries supply different areas of the brain, where the brain is damaged will determine which functions are affected.

So, you can see how a stroke impacts the person will depend on how much, and what part of the brain is damaged.

Different strokes for……you get the picture.

As I have said many times before, prevention is better than cure, and strokes could be prevented. We’ll talk about risk factors as well.

So, what is a stroke?

What is a stroke? In simple terms, a stroke occurs when a blood vessel supplying blood to the brain either suddenly becomes blocked, or bursts and begins to bleed.

As a result, the flow of blood downstream from the blockage or bleed stops and brain cells die due to a lack of oxygen and nutrients.

And they die at the rate of around 1.9 million brain cells per minute. In 2018, an estimated 387,000 Australians aged 15 and over (1.3% of the population) had experienced a stroke at some time in their lives, based on self-reported data from the ABS

Different types of strokes

There are two types of strokes and both types stop blood flow to areas of the brain.

One type of stroke is called an ISCHAEMIC (is..key..mick) stroke.

The other is a HAEMORRHAGIC (hem..or..ragic) stroke.

Ischaemic Stroke

This occurs when a blood vessel in the brain becomes blocked by a clot. There are two ways a blockage in these blood vessels can occur.

Embolic

When a blood clot forms in another part of the body and travels around the body in the bloodstream until it reaches the brain.

The clot will then move around the brain until it gets stuck in a blood vessel which is too small for the clot to pass through.

This blocks the blood vessel and prevents blood from getting through. And brain cells begin to die.

Thrombotic

If the blood contains cholesterol-laden plaques, these can stick to the inner walls of the blood vessels as the blood moves through them.

Over time, these plaques can increase in size and narrow or block the artery and stop blood from getting through.

If the blocked blood vessel is in the brain, then no blood will get through and brain cells will begin to die.

In the case of stroke, the plaques most often affect the major arteries in the neck taking blood to the brain.

Haemorrhagic stroke

Once again there are two types. Where they occur in the victims’ brain determines what they are called.

An Intracerebral Haemorrhage (ICH) occurs when an artery inside the brain bursts and bleeds into the brain.

This results in blood flow to part of the brain being reduced or stopped and brain cells begin to die.

Also, as the amount of blood flow into the brain increases, the build-up of pressure can lead to brain damage, unconsciousness or even death.

Then there’s bleeding on the surface of the brain. This can result in Subarachnoid Haemorrhage (SAH). There are 3 layers of membrane (or meninges) that cover the brain.

A subarachnoid haemorrhage is a bleed that happens underneath any of these layers.

Now, there are quite a few medical terms in there but as I said in the introduction – in simple terms a stroke occurs when blood flow to part of the brain stops, for whatever reason, and brain cells die.

Types of strokes. Ischaemic stroke.
When a blood vessel in the brain becomes blocked by a clot. Haemorrhagic stroke.
When an artery inside the brain bursts and bleeds into the brain.

Recognising a Stroke

The Stroke Foundation Australia endorses the F.A.S.T. test when you suspect someone has had a stroke.

F – Face look closely at the victim’s face. Has their mouth drooped?

A – Ask them to lift both arms. Can they lift them both?

S – Speech. Ask them something. Is their speech slurred? Do they understand you?

T – Time Is critical. If any of these signs are present call 000 straight away.

Recognising a stroke. FAST.

F – Face. Look closely at the victim’s face. Has their mouth drooped?
A – Ask. Ask them to lift both arms. Can they lift them both?
S – Speech. Ask them something. Is their speech slurred? Do they understand you?
T - Time Is critical. If any of these signs are present call 000 straight away.

This simple test provides an accurate stroke assessment. There are of course other possible signs of stroke.

  • weakness or paralysis elsewhere in the body, on one or both sides
  • loss of sensation, usually on one side
  • loss of vision or blurred vision in one or both eyes
  • a sudden and severe headache
  • dizziness, loss of balance or an unexplained fall
  • difficulty swallowing

A stroke is a medical emergency and the longer it takes to get proper treatment, the more likely there will be long-term stroke-related damage to the brain afterwards. Don’t faff around. Act Fast. Get medical help immediately.

So, what causes a stroke?

What are some of the risk factors? I bet you can guess.

All the usual suspects:

  • smoking,
  • not enough physical activity,
  • unhealthy eating,
  • high blood pressure,
  • type2 diabetes,
  • high cholesterol

The risk factor of some of those can be reduced.

Of course, some risk factors cannot be reduced:

  • Your age — Most people who have a stroke (7 out of 10) are 65 years or older.
  • Your family history — If one of your parents had a stroke before they were 65, your risk of getting one is 3 times greater than average.
  • Your gender — Stroke is more common in men, especially between 65 and 84 years of age.
What causes a stroke?
Smoking, Type 2 diabetes, High cholesterol, Unhealthy eating, High blood pressure and Not enough physical activity.

Head Trauma

According to experts, trauma to the brain through a head injury can contribute to stroke later in life.

There is an association between head trauma and an increased incidence of haemorrhagic strokes in the years that follow as well as an increased lifetime risk of ischemic strokes in the years after head trauma.

Check out our blog on head trauma

Conclusion

As with many things in life, there are some things we can change and others we cannot escape.

As my old friend Publilius always said, “The defect which one period of life fastens upon us, another will remove.”

We could all make changes which may go a long way to remove the defect(s) one period of life has fastened upon us.

All the usual suspects. (see above)

If we wanted to…

But hey, YOLO, right?

Well, that’s that. Until next time….. stay safe

Adrian

How long does a First Aid certificate last?

How long does a First Aid certificate last?

How long does a First Aid certificate last?

Good question
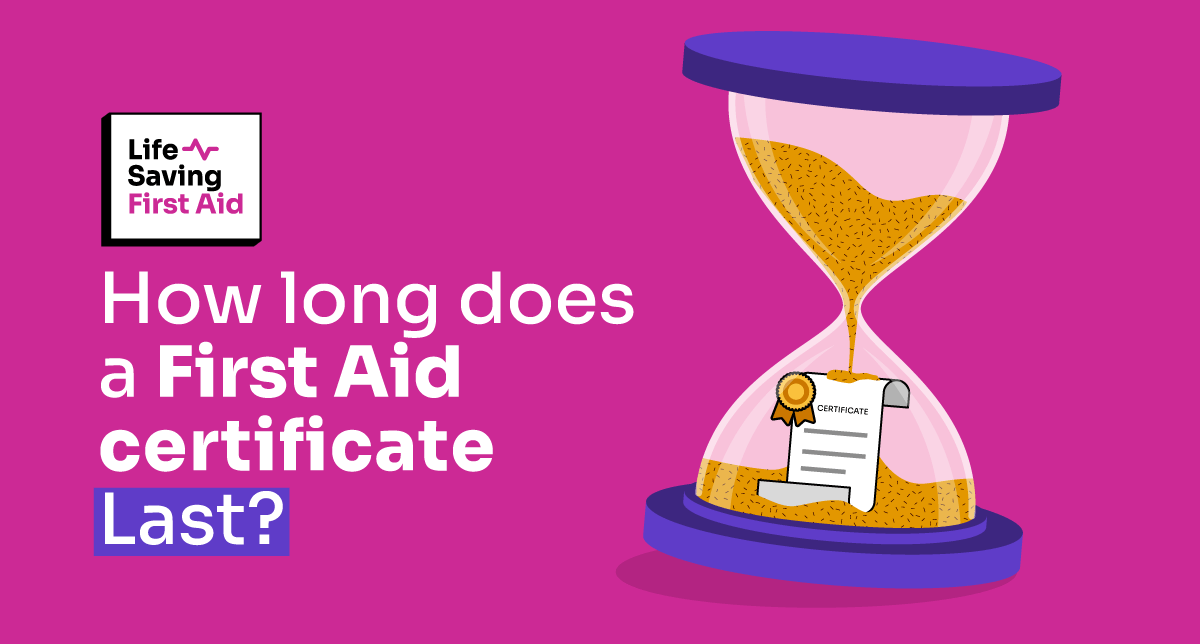
How long does a first aid certificate last? We get asked this question in nearly every training session.

The answer is –  Actually, a First Aid certificate does not have an expiry or renewal date.

Surprised?  So, What’s the catch?

Well, according to the “First aid in the workplace Code of Practice” developed by Safe Work Australia, and I quote:

“First aiders should attend training on a regular basis to refresh their first aid knowledge and skills and to confirm their competence to provide first aid. Refresher training in CPR should be carried out annually and first aid qualifications should be renewed every three years.”

Safe Work Australia is the national policy body responsible for the development and evaluation of Work Health and Safety guidelines. They have recommended that qualifications are renewed:

  • Every year for CPR
  • Every 3 years for First Aid
When do I renew my First aid certificate? CPR is every year. Provide first aid and Childcare first aid is every 3 years.

Renew your certificate

You may have noticed that first aid qualifications and courses change every so often. Why, because they are regularly reviewed by industry bodies to ensure they keep pace with any new developments in first aid.

So, renewing your first aid certificate every three years makes sense. Keeps your skills and knowledge current.

A CPR refresher every year also makes good sense as CPR is really effective if done correctly.

Reviewing the proper method to do CPR every year allows you to practice and refresh your CPR skills.

You never know when you may be called upon to help someone.

Back to Blogs

As you can see, this is a very short blog just to answer the question –

“ How long does a first aid certificate last? “

It’s short because I have been busy conducting training sessions and onboarding new trainers. This has taken up most of my time.

Consequently, no blogs for a month!

Hopefully, I can now get back into it.

Watch this space..

Well, that’s that. Until next time….. stay safe

Adrian

Head injuries

Head injuries

Introduction

So I was watching my grandsons under 11s footy match a few weeks ago and couldn’t help overhearing a conversation between a couple of elderly gentlemen, also watching the game. Their conversation highlighted some of the effects of head injuries. It went something like this:

Gent one. ” Remember the good old days when we played footy? The coach never worried if we got concussions or head injuries, he would just send us back in.”

Pause

Gent two. “No.”

It made me smile. I could relate. As a youngster, and even into my twenties playing sport, there was a very casual approach to head injuries. ” You’ll be ok” was the general panacea for all knocks to the Uncle Ned. ” In ya go”! No thought at all for any long-term damage to anyone’s brain.

Memory loss, long-term brain damage, major trauma in the short term, or even – worst case scenario – death could be the end result of what appears to be a minor head injury.

Never considered.

Then I thought about how the attitude to head injury has changed. How there is a greater understanding now of the impact a head injury can have on a person.

Now in sports, players who suffer a head injury, no matter how minor, are removed from the game, assessed, rested, reassessed and either sent back on or sent to hospital for even more assessment and tests.

And rightly so.

Damage to the brain can result from even minor head trauma as this causes the brain to move inside the head and collide into the skull.

When the head hits something with a hard enough impact, the brain can twist and strike the skull.

A bit about the BRAIN

The brain is a soft and delicate organ, approximately 75% water that can generate more electrical impulses in one day than all the telephones on the planet.

One hundred billion neurons processing information, 161,000 blood vessels to keep them all functioning, generating enough electricity to power a light bulb.

It is a miracle of natural computing power and an absolutely vital element for your quality of life.

That’s all very interesting, but as this blog is about head injuries and not the brain, the important bit for us is “soft and delicate”.

Although your soft and delicate brain is protected by your skull, which is very strong, a hard blow to the head can cause a brain injury. There may even be no visible signs of trauma to the scalp or face.

And, as the brain itself does not feel pain because it has no pain receptors you will have no warning – pain – if any damage has occurred.

Indications that something is seriously wrong may come later.

Head Injuries

Head injuries may be caused by a number of mechanisms including, falls, assaults, motor vehicle crashes, sporting injuries and, less commonly, penetrating injuries.

It is important to note that a head injury does not always result in a loss of consciousness or memory.

Even if there is a suspected head injury it should be treated with the utmost care.

A final assessment of the injury should still be done by a health care professional.

Be aware that if the head is injured, the neck and spine may be injured too.

There are two types of head injury

  • Open – with bleeding wounds to the face or head
  • Closed – no visible signs of injury to the face or head


Head Injuries – signs and symptoms

Head Injuries signs and symptoms.

Blood is not a reliable indicator of the seriousness of a head injury. This is because minor cuts on the head often bleed heavily as the face and scalp have many blood vessels close to the surface of the skin.

Although this amount of bleeding may be alarming, many times the injury is not severe.

 Apart from wounds, other symptoms of serious head injuries can include:

  • Altered consciousness – for example, loss of consciousness for even a short period then regains consciousness but is confused and or drowsy. Their condition improves for a while, deteriorating again later. They may even experience a small seizure or persistent headache.
  • Skull deformities – signs of Fracture are indications there may be compressions or deformities. A serious head injury.
  • Clear fluid from the ears or nose – a skull fracture, especially a fracture to the base of the skull, can allow cerebrospinal fluid to leak from the ears or nose.
  • Black eyes and bruised skin behind the ears – this indicates that the blow was of sufficient force to rupture blood vessels around the eyes and ears.
  • Vision changes – dilated (enlarged) pupils or different pupil sizes often indicate serious head injuries. The casualty may also complain of double or blurred vision.
  • Nausea and vomiting – these are common side effects of serious head injuries and should always be considered important if they persist.


Remember, a victim may have a brain injury without any external signs of injury to the head or face. Serious problems may not be obvious for several hours, or even days, after the initial injury.

Management of head injuries

Follow the initial action plan DRSABCD with a focus on assessing and managing the airway and breathing.

For a conscious casualty

  • Encourage the injured person to minimise any movement of their head or neck and control any significant blood loss from head wounds with direct pressure and a dressing.
  • Reassure the casualty and monitor their condition.
  • Call 000 if the casualty lost consciousness, suffered altered consciousness even for a short time, or any of the above symptoms indicating head injuries are present.
  • If 000 called do not give the casualty any food or drink.

Unconscious Casualty

  • Call 000.
  • The casualty should not be moved unless they are in immediate danger. Be aware that any movement may cause greater complications to their head injury as well as their spine.
  • If they are lying on their back, you will need to place them in the recovery position.
  • If the person stops breathing or has no pulse, cardiopulmonary resuscitation (CPR) may be needed.

Once again follow the initial action plan DRSABCD with a focus on assessing and managing the airway and breathing, whilst caring for the neck until expert help arrives.

Remember, if they have a serious head injury, the neck may be injured too.

After any head injury, advise your casualty to seek professional medical advice as soon as possible.

Concussion

As far as head injuries go, concussion is the most common place. But what is concussion?

According to the university of Qld. –

“Concussion is the most common and mild form of traumatic brain injury. Within the skull, the brain floats in a protective suspension of cerebrospinal fluid. Concussion occurs when either a direct impact or whiplash effect – either through a blow to the skull or the body — causes the brain to move inside the head and collide into the skull. As a result, neurons are damaged and the brain may bruise at the site of impact. You don’t have to lose consciousness to have a concussion, and the force required for it to occur is small.”

Concussion is quite a common sporting injury, predominately contact sports, such as Australian rules football, rugby league and rugby. The AFL website has a great blog on concussion in AFL and some very useful tools.

Other activities such as horse riding, cycling and skiing, with a high risk of falls, are also common causes of concussion.

Traumatic Brain Injury (TBI)

A Traumatic Brain Injury ( TBI ) is an injury to the brain caused by an external force and is classified according to its severity: mild, moderate or severe.

Signs and symptoms of TBI

Traumatic Brain Injury
Signs and Symptoms

Mild to moderate:
 Headaches, dizziness and fatigue, sleep disturbances, 
memory or concentration problems and  blurred vision.

A person may not display all of these at all times.

Moderate to severe:
 Slurred speech, profound confusion, seizures, persistent headaches, loss of consciousness.

According to the same University of Qld. study, a staggering 89% of concussions will not be assessed by a medical professional, and 70 to 90% of concussions are TBIs! (Here is the link to the study: https://qbi.uq.edu.au/concussion/what-is-concussion )

The message here is clear – ANY head injury must be taken seriously and professional medical attention should be sought.

Recovery from concussion

Generally, most people recover fully within 2 weeks, however, children usually take longer to recover.

For some people, symptoms can continue for longer, especially if they have had a head injury before.

A small number of people have longer-term complications such as ‘persistent post-concussive syndrome’ when concussion symptoms continue for longer than 3 months after the event.

Of course, see your doctor if you are concerned about ongoing symptoms after a concussion.

I found lots of great stuff while researching this blog so watch this space for some more on head and brain trauma.

So, for this blog on head injuries, I’ll give the last word to my old friend Publilius

“Even when the wound is healed, the scar remains.” Gives me goosebumps….

Well, that’s that. Until next time… Stay safe!

Adrian

Eye Injuries

First aid for eye Injuries

Introduction

Because our eyes are two of the body’s most delicate and complex organs we need to avoid eye injuries as best we can.

And here’s an… eye-opener for you, our eyes do not actually see anything!

As the great Roman writer, Publilius Syrus once said “The eyes are not responsible when the mind does the seeing.” Obviously, a man of great…insight. A man of….vision.

As you can… see, in this blog I am talking about our eyes. I am going to…. focus on eye injuries, (and bad puns apparently!).

We are going to look at the many different factors that can cause Injury to the eyes including some of the common causes in our everyday environments such as stones, sporting balls, dirt, and chemicals.

It seems that around a whopping 70 to perhaps 80% per cent of all the sensory receptors in your whole body are in our eyes.

Also, in order for us to see, recognize, and understand something—nearly half of our entire cerebral cortex has to get involved. That’s a lot of brain power.

How do your eyes work?

Your eyes iris will change in size to allow more or less light in. This depends on the amount of light getting reflected into the eye.

We have all stepped outside during a bright day and felt blinded at first before our eyes adjust. This is the process of our iris adapting to lighting conditions.

Depending on how far away the object being viewed is, the lenses will change shape.

To focus your eyes ligaments surrounding your eye pull or release the lenses.  This is called accommodation.

When light enters the eye through the pupil, it strikes photoreceptor cells in the retina called rods and cones.

Rod cells are responsible for peripheral vision and night vision, while cone cells react to brighter light, colour, and fine details.

When light hits its corresponding rod or cone, this activates the cell, causing nerve impulses to fire through the optic nerve — the middleman between the eye and the brain.

The impulses travel from the optic nerve to the visual cortex and then to other parts of the brain.

These image impulses arrive at the brain upside down. The brain must then transform the image to right side up for us to comprehend it.

So, while your eyes do a really good job of capturing light from objects around you, transforming that into information, and sending that information to your brain, your eyes don’t actually “see” anything.

That part is done by your visual cortex and your brain. Neurons in your brain work simultaneously to rebuild the image passed to the brain from the optic nerve.

Your brain actually responds better to shapes and edges first. Colour and shading are used to further differentiate objects from one another. Your eyes are also set slightly apart. This gives you the ability to see in stereo and interpret 3D images. Unfortunately, this also creates an image that needs to be corrected by you guessed it, your brain.

More than meets the eye

As you can see, there is more going on with your visual system than you imagine. Complex parts of your brain that have evolved over aeons to produce a crisp, sharp image are constantly being used to help you see and understand the world around you.

This means that the brain will also fill in the gaps to make sense of the image received. This is why we can be tricked by optical illusions, or people can “see” the same thing but understand it differently.

It also means that any permanent damage to your eyes will have a profound effect on how you perceive your environment.

Eye injuries

An eye injury can be caused by many different factors, but some common causes exist in our everyday environment such as stones, sporting balls, dirt, residue, sand, and wooden splinters. Other common causes include body parts, chemicals,  welder’s flash, ultraviolet light, and smoke.

Eye Injuries caused by foreign bodies

A foreign body is defined as “an object in your eye that shouldn’t be there”. This includes a speck of dust, a wood chip, a metal shaving, an insect, or a piece of glass. The common places to find a foreign body are under the eyelid or on the surface of your eye.

Signs and Symptoms:

  • sharp pain in their eye followed by burning and irritation
  • feeling that there is something in their eye
  • watery and red eye
  • scratchy feeling when blinking
  • blurred vision or loss of vision in the affected eye
  • sensitivity to bright lights
  • bleeding into the white of the eye

Most injuries from a foreign body in the eye are minor and usually heal without further problems given the right care. However, possible complications from eye injuries include:

  • infection and scarring – if the foreign body is not removed from your eye, it may lead to infection and scarring.
  • corneal scratches or abrasions – a foreign body may scratch the cornea, which is the clear membrane on the front of the eye. Commonly, the foreign body is trapped under the upper eyelid.
  • ulcer – sometimes a scratch on the cornea doesn’t heal. A defect on the surface of your eye (ulcer) may form in its place.
  • penetration of the eye – sometimes a projectile object can pierce the eye and enter the eyeball, causing serious injury and even blindness
  • corneal scarring – this can cause some degree of permanent visual impairment.

Management

As with all First Aid incidents you should apply the initial action plan of DRSABCD and use proper PPE if available.

For eye injuries, if First Aid is applied immediately when irritation or injury occurs you decrease the possibility of infection or loss of sight enormously.

If the eye injury involves foreign irritants such as dust getting in the eye, you may follow these general procedures for flushing out irritants

  • Keep the casualty calm and reassured.
  • Use clean running water to flush out irritants in the eye.
  • Make sure the eye is open throughout the procedure.
  • Allow the casualty to blink.
  • Avoid rubbing or otherwise disturbing the affected eye, and it is recommended to see an eye doctor

In cases where there is a penetrating wound in the eye and the object is still embedded in the injury, you must follow the following procedures:

  • Do not remove the penetrating object
  • Reassure the casualty and advise them to minimise eye movement. Placing a patch over both eyes, if the casualty is willing, can reduce the injured eye movement
  • Wrap a bandage around the protruding object or form doughnut-shaped dressing to place over and support the protruding object when dressing and bandaging the injury. This will avoid putting pressure on the object with the bandage
  • Be sure to immobilise the object.
  • Seek medical assistance Call 000

Eye injuries due to burns

Burns to the eye are serious as they can cause partial or complete loss of sight. The worst type of eye injury

They can be caused by chemicals, heat (flames or radiant heat), a welding flash, ultraviolet lights, glues, and solvents. If chemicals contact the eye, you must apply First Aid as soon as possible

Signs and Symptoms

Burns to the eye will cause

  • immediate pain and swelling
  • become red and watery
  • your casualty may be more sensitive to light.

However, if the burn is caused by a welder’s flash it will not be until several hours afterwards that they will start to feel the effects and realise they have an eye injury

Management

  • Calm and reassure the casualty
  • Open their eyelids carefully
  • Carefully wash the eye or eyes with cold flowing water for 20 minutes
  • Place an eye pad or soft, clean dressing over the injured eye
  • Call 000

Wounds causing eye injuries

Fighting or playing sport can cause direct impact to the eye and serious eye injuries such as cuts and bruising around the eye.

Cuts to the eyelid can bleed freely so you will need to apply a dressing to the eyelid to halt the bleeding as soon as possible.

It’s important you apply the dressing with extreme care to avoid additional pressure on the eye which may cause more damage.

Don’t forget to reassure the patient and advise them not to move their eyes. Make them as comfortable as possible even lie them on their back.

And, of course, use DRSABCD and CALL 000

Postscript

If you lose a sense, such as eyesight, do your other senses get stronger to compensate for the loss?

What I found really interesting while I was researching for this blog was just that.

While I figured that would be the case, there is a lot of scientific evidence now which indicates that due to a serious eye injury you no longer need to use that part of the brain to process images, more energy and processing power is shifted to the other senses especially hearing.

Improved hearing enhances the ability to move through the world. For example, visually impaired either through eye injuries or from birth, individuals often use a technique called “clicking.”

By making small clicking sounds and then interpreting the echo they hear they can make sense of the environment around them.

Using this echolocation technique can even allow people to determine individual objects and walk normally without bumping into walls or obstacles.

The heightened sense of hearing allows the brain to differentiate the echoes that return after these clicks. For those of us who typically rely on our eyes, this seems impossible.

But get this, even more remarkable, brain scans of visually impaired individuals “clicking” reveals that the sounds are not only processed by the auditory cortex, but also in the visual cortex, despite not being able to “see.”

Truly, the human brain is incredible!

You can see some more quotes from Publilius here: https://www.brainyquote.com/authors/publilius-syrus-quotes

“It is folly to punish your neighbour by fire when you live next door.” Publilius, the wise.

Well, that’s that. Until next time….. Stay safe

Adrian

How to protect your back when lifting

How to protect your back when lifting

Introduction

Having a bad back is a pain in the butt! If you suffer from a bad back will know how debilitating it can be.

According to the Australian Institute of Health and Welfare, approximately 16% of the Australian population is afflicted with chronic back problems. That’s around 4.3 million men women and some children.
Australian Institute of Health and Welfare

The age group with the most sufferers of chronic back pain is 55 – 64 years old. The least, 0 – 44 years old.

And the cost to our health system?

A staggering $3.3 Billion in 2018/19 (24% of the total health system budget). One can safely assume this cost has increased for 2021/22.

A chronic and persistent bad back can have a seriously negative impact on a person’s quality of life.

“Prevention is better than cure”  Ahhh.. that old chestnut. But, when it comes to looking after your back, it is great advice. Much better to prevent a bad back, than trying to fix one!

In this Blog, we are going to look at the mechanics of the body and give you some tips on how to lift and carry objects safely, also known as Manual Handling.

Biomechanics

Biomechanics is the science of movement of a living body, including how muscles, bones, tendons, and ligaments work together to produce movement.

When you decide to move, the motor cortex of your brain sends an electrical signal through the spinal cord and nervous system to the muscles. The muscles respond, moving body parts you want to be moved, by contracting and then relaxing.

Because they can pull bones, but can’t push them back to the original position, muscles work in pairs of Flexors and Extensors.

The flexor contracts to bend a limb at a joint. When the movement is completed, the flexor relaxes and the extensor contracts to straighten the limb at the same joint.

For example, the biceps muscle, in the front of the upper arm, is a flexor, and the triceps, at the back of the upper arm, is an extensor.

When you bend at your elbow, the biceps contract. Then the biceps relaxes and the triceps contract to straighten the elbow.

The motor cortex on the right side of the brain controls the muscles on the left side of the body and vice versa.

The contractions of the muscles can be classified as

  1. Static Contractions – this where the muscle is in constant muscle contraction – no movement of a part and muscle force is equal to the load.  When you hold and carry a load for example.
  2. Dynamic Contractions – where there is visible movement of the load. Muscle forces are changing with the movement of the load. Lifting, pushing or dragging a load

Principle of Levers and Strength

For any body part to move, the appropriate muscles and bones must work together as a series of levers.

A lever:

  1. is a rigid structure, “the lever” –  for example, your forearm or thigh bone ( Femur )
  2. is hinged at one point which is the pivot point or fulcrum – in this case, your elbow or knee joint

When forces (Effort) are applied to the lever – for example, your bicep contracts and raises your hand.

The force is removed – your bicep relaxes, your triceps contract and your hand drops down.

Strength:

Muscle strength is determined by the following:

  • Physiological strength – muscle development, cross-sectional size, results of training etc.
  • Neurological strength – how powerful or weak is the signal that tells the muscle to work
  • Mechanical strength – muscle power, angle on the lever,  joint abilities etc.

These three factors work together and affect muscular strength.

Good Posture

Good posture is important, including positions when the body is not moving, as well as in motion.

You should try and keep your back as close to these 3 normal curves of the back as possible:

  1. A slight inward curve at the neck
  2. An outward curve between the shoulder blades
  3. An inward curve in the lower back

Try this simple test for yourself. Stand with your back against a wall. Your head, upper back, and butt should all touch the wall.

At your neck and your lower back, you should be able to fit your hand in between your body and the wall.

Do it now. You know you want to.

I can wait.

How did you go? Were you able to fit your hand in between your body and the wall at your neck and your lower back?

If you could… Great, you have good posture.

You couldn’t? Then you might want to see a Physiotherapist, Osteopath or perhaps a Chiropractor for some advice.

If you have a poor posture, the complications can include back pain, spinal dysfunction, joint degeneration, rounded shoulders and a potbelly.

You can improve your posture and spinal health by making a few lifestyle adjustments.

Flexion of the trunk and spine occurs when you bend over without bending your knees, and your back is facing up. Extension is the opposite of Flexion. That is, the spine and trunk are bent backwards.

By maintaining appropriate posture and manual handling techniques you can reduce the possibility of injury.

What is Manual Handling?

Manual handling simply means using your body to exert force to handle, support or restrain anything.

This includes animals, people, and objects.

So, you can see it’s not only about lifting or carrying heavy objects. Pushing, pulling, holding, lowering, throwing, carrying, packing, assembling, cleaning, sorting, and using tools are all included in manual handling.

Pushing a trolley, walking the dog, or using a keyboard are all examples of manual handling.

See our manual handling course for more information.

SMART Technique

Remember – Prevention is better than cure!
When lifting, use these safe working practices to reduce the risk of injury.

Smart technique. Size up the load, move the load close to your body, angle your knees wide and use a semi-squat, raise the load using your legs and turn your feet, not your back.
  • S: Size up the load – Assess the load size, shape, and weight. If it is too heavy or big – do NOT lift it. Find another way to move the load.
  • M: Move the load close to your body and get a firm grip that can be held for the full distance of the carry.
  • A: Angle your knees wide and use a semi-squat, don’t stretch your back and keep your spine in its natural curve.
  • R: Raise the load using your legs and complete the lift smoothly and in one move.
  • T: Turn your feet, not your back when you change direction and set the load down by squatting. Let your legs do the work.

As well as remembering SMART when lifting objects,  there are other safe working practices which you can use to reduce the risk of injury. Some of these are:

  • Avoid lifting above shoulder height
  • Use non-repetitive movements, and don’t stay in the same position for long periods.
  • Keep carrying distance as short as possible and free from obstacles
  • Try not to change grip or ‘jerk’ the load
  • Lower the load by bending the knees and keeping the back straight
  • Let the legs do the work when pulling or pushing the load
  • Know your capabilities – if you can carry the load, see where you are going, etc.
  • Know if any mechanical or manual assistance is required
  • Know what you might need for safety/protection

Please read the following article to learn more about risk assessment.

Lifting and Carrying the Load

When you have taken all these things into account and you are going to lift the load, now’s the time to use a good lifting method.

  • Feet – shoulder width apart
  • Knees – bend at the knees
  • Hips – flex at hips, not waist or back
  • Head – hold straight
  • Back – keep in alignment with shoulders and pelvis
  • Hands – use 2 hands and grip securely
  • Arms and load – close to your body
  • Stomach muscles – tighten, but remember to breathe
  • Lift – use thigh and leg muscles, avoid twisting, rotating, or jerking

Now that you have lifted the load you need to carry it and then put it down.

Just as for lifting, there are some rules you should follow for both carrying and lowering a load.

Some rules to follow for carrying the load include:

  • Maintain a slightly arched or straight back
  • Walk slowly and carefully
  • Use your feet to change directions
  • Do not twist your back
  • Avoid leaning over
  • Avoid lifting a load over your head
  • If you become tired set the load down and rest

And when placing the load on the ground:

  • Position yourself where you want to put the load down
  • Squat using  your legs to do the work, not your back
  • Avoid twisting your body and keep your head up as if looking forward
  • When the load is where you want it and it is secure, you can release your grip

Slips, trips, and falls

Of course, when carrying any object, you need to be mindful of the path you are taking and aware of any slips, trips or falls risks on your way.

These are some of the causes of slips, trips, and falls and some of the injuries that you could suffer as a result.

Causes of slips, trips, and falls. Slippery or rough surfaces,
Electrical cords, loose carpet, and other obstacles.
Surfaces can be continually wet.
Inappropriate footwear such as thongs or bare feet.

Some injuries you could suffer from slips, trips, or falls are:

  • Broken bones
  • Abrasions
  • Bruising
  • Strains and sprains
  • Overstrained joints, bones, and ligaments and or dislocations
  • Back or spinal injuries
  • Serious traumatic injuries

Conclusion

  • Maintain good posture
  • Always lift SMART 
  • Reduce the risk associated with slips, trips, and falls in your workplace
  • Practice good housekeeping
  • Check the path to the destination for any hazards before lifting and moving

Well, that’s that. Until next time… Stay safe!

Common winter sports injuries

Common Winter Sports Injuries

Introduction

There can be extreme joy with snow sports. Excitement. Adrenaline. The breathlessness experienced after achieving a perfect run or, through luck or skill, narrowly avoiding catastrophe.

That’s a good day.

A bad day?

When gravity, weather and snow conditions, fatigue or a momentary lack of concentration combine, you catch an edge, and host a yard sale*. Or worse still, you suffer an injury worthy of a Ski Patrol rescue that keeps you away from the snow for the rest of the season. Maybe permanently.

Of course, prevention is better than cure so, do your best to prepare for your chosen activity on the slopes to prevent winter sports injuries. Snowsafe Australia has some great advice for safety and preparation, but that’s a whole different subject.

This blog is about injuries common to snow sports and how to manage them.

The Numbers of Winter Sports Injuries

Worldwide, injuries occur at a rate of about 3 injuries per 1000 skiers. The Australian numbers reflect this trend.

According to the Australian Institute of Health and Welfare (AIHW), the reported number of injuries for snow sports against the number of participants for 2019 – 20 aged 15 and over, was 5 per 1000.

So how many people are skiing and snowboarding?

Approximately 277,000 participants in snowboarding and skiing for 2019 – 20 aged 15 and over, according to AusPlay.  Add another thousand or five for children under 15 years!

Safety on the Slopes

There is some great information on how to manage an accident while skiing or snowboarding on the Snowsafe website.

Here is a brief over of the main points you need to know in case of an accident on the slopes.

If someone is injured, stay with them. Call or send for Ski Patrol. Remember to describe what the person is wearing so Ski Patrol can identify them.

To get to the casualty you should approach from the side or up from below their position, especially if the slopes are icy.

If the slopes are icy it is important to keep your skis or snowboard on. If you can take them off, cross your skis, or place your board upright in the snow, uphill from the casualty. You can also get someone to stand uphill of the casualty to give a warning to others using the slope, if possible.


Do not remove the casualty’s skis or snowboard, and leave the casualty where they are if it is safe to do so.

Reassure the casualty and keep them warm. Wait for the ski patrol.

Winter Sports Injuries

From the  AIHW, in 2019-20 there was a total of 1,654 hospitalisations due to Winter sports injuries. 59% of those were injuries due to falls. 

The most common injuries were fractures at 60% with dislocations and soft tissue injuries combined at 27%.

Fractures mean broken bones: arms, legs, ribs. Dislocations and soft tissue injuries refer to dislocated joints: shoulder, knee, wrist, and soft tissue injuries: sprains and strains of wrists, ankles, muscles, and tendons.

Concussion from head injuries is always a concern.

It is recommended that the Ski Patrol manage all first aid on the slopes. However, there may be occasions when they are delayed, not available, or you are some distance away from them such as cross-country skiing.

If this is the case you may have to provide some First Aid to the casualty.

Joints

When muscles, tendons and ligaments are cold they have less elasticity and are therefore more prone to injury. It is also well known that sporting performance is reduced in cold conditions. When these two factors combine, falls are more likely and injuries are usually more severe.

Statistically, ligaments and muscles acting on the joints of the knees, shoulders, wrists, and spine are the most common soft tissue injuries from falls while skiing or snowboarding.

Joints absorb shocks and give us movement; ligaments support parts of the joints and tendons join the muscles to the bone.

As mentioned before, joints connect bones. They provide stability to the skeleton and allow movement.

Joints are held together and supported by ligaments. Smooth cartilage prevents friction as the bones move against one another.

In freely movable joints, the entire joint is enclosed inside a membrane filled with lubricating synovial fluid, which helps to provide extra cushioning against impact.

In general, the greater the range of movement, the higher the risk of injury. This is because the strength of the joint is reduced.

There are different types of joints allowing different movements.

  • Ball and socket joint –  where the rounded head of one bone sits within the cup of another, for example, the hip joint or shoulder joint. Able to move in all directions
  • Saddle joint – allows movement back and forth and from side to side, but does not allow rotation, such as the joint at the base of the thumb.
  • Hinge joint –where the two bones open and close in one direction only such as the knee and elbow joints.
  • Condyloid joint –movement without rotation, such as in the jaw or finger joints.
  • Gliding joint –where the smooth surfaces slip over one another, allowing some movement, such as the wrist joints.

Common Joint Injuries Include:

  • Dislocations – when two connected bones slip out of position in a joint.
  • Fractures and breaks.
  • Sprains and strains – of the Ligaments and Tendons around the joint.
  • Overuse injuries such as tendonitis – making the same movements repeatedly over time, the body’s joints and surrounding tendons and muscles become irritated and inflamed.
  • Osteoporosis – bones that are weakened from a loss of bone density, due to a lack of calcium. As a result, the bones that make up the joint may break easily.

Signs and Symptoms of a Dislocation

  • Pain, Swelling, and Bruising
  • Instability of the joint and/or loss of ability to move the joint
  • Visibly deformed joint where the bone looks out of place

Management of a Dislocation

DO NOT try to replace or reduce a dislocation. Leave that for the Ski Patrol, Ambulance or Medical Professional.

Follow these steps:

  1. If the injury is to a limb: Check for any circulation and if absent, move the limb gently to try and restore it.
  2. Call 000 for an ambulance, or in this case, Ski Patrol.
  3. Place and support the limb using soft padding and bandages.
  4. Use icepacks, if possible, over the joint.
  5. If the shoulder is dislocated, support the arm in a position of least discomfort use a sling if needed and apply an ice compress.
  6. If the wrist is dislocated, support using a sling and apply an ice compress.

When using ice, make sure to apply it for ten minutes with 1 Hour rest in between or 20 minutes on / 2hrs off.

Sprain and Strains due to Winter Sports Injuries

The difference between a sprain and a strain is that a sprain injures the bands of tissue that connect two bones together, while a strain involves an injury to a muscle or to the band of tissue that attaches a muscle to a bone.

Ligaments are bands of tough elastic tissue around your joints. They connect bone to bone, give your joints support, and limit their movement. You have ligaments around your knees, ankles, elbows, shoulders, and other joints.

A sprain is when a ligament supporting a joint is overstretched or torn. Sprains commonly happen in the ankle, knee, or wrist.

Strain

Strains on the other hand occur when a tendon, or muscle, is overstretched or torn.

Tendons are tough, flexible, and inelastic bands of fibrous connective tissue that connect muscles to bones.

Strains are often the result of repetitive movements and from overtraining without adequate time for rest and muscle repair in between workout sessions.

Common areas affected by strains are the leg, foot, calf, groin, hamstring and back.

Signs and Symptoms for Strains and Sprains

This include:

  • Pain, bruising and swelling in the affected area
  • Sudden pain in the affected area along with loss of power in the affected limb
  • The muscle in the affected limb is tender to the touch

Sprains and Strains Management

To manage strains and sprains we can follow our R.I.C.E.R. action plan

To manage strains and sprains we can follow our R.I.C.E.R. action plan

  • Rest – encourage the casualty to stop any activity and make them comfortable
  • Ice – Apply an icepack, wrapped in cloth, to the injured area
  • Compression – apply an elastic bandage, if available, over the injured area. Not too tight, you need to allow for circulation
  • Elevate – elevate the injured area above their heart height if practical
  • Refer – refer them to a medical professional to have the area looked at.

When treating using R.I.C.E.R. you should also do no Harm.

NO

  • Heat – apply no heat to the injury
  • Alcohol – No alcohol
  • Running – do no activity that might affect the injury
  • Massage – do not massage the injury.

This method should be used within the first 48–72 hours (depending on severity) after the injury to speed up the recovery process.

Winter Sports Fractures

Fractures, although painful, are often not life-threatening injuries. However, it is important they are managed correctly to ensure the healing process – around four to eight weeks to heal, depending on the age and health of the person and the type of break –  can run its course without any disruptions such as infection, permanent deformity, or lifelong disability.

There are different types of bone fractures. Some are more severe than others, depending on the strength and direction of the force, the bone involved, and the person’s age and general health.

As a First Aider, it is important you can recognise the different types of fractures so you can apply the correct First Aid.

Different Types of Fractures Include:

  • Closed or simple fracture – the broken bone has not pierced the skin
  • Open or compound fracture – the broken bone juts out through the skin, or a wound leads to the fracture site.
  • Greenstick fracture – A greenstick fracture occurs when a bone bends and cracks, instead of breaking completely into separate pieces. The fracture looks like what happens when you try to break a small, “green” branch on a tree. This can occur in children because their bones are more flexible than an adult’s bones
  • Hairline fracture – the most common form is a stress fracture, often occurring in the foot or lower leg because of repeated stress from activities such as jogging or running
  • Complicated fracture – structures surrounding the fracture are injured. There may be damage to the veins, arteries or nerves, and there may also be an injury to the lining of the bone (the periosteum)
  • Comminuted fracture – the bone is shattered into small pieces. This type of complicated fracture tends to heal more slowly
  • Compression fracture – occurs when two bones are forced against each other. The bones of the spine, called vertebrae, can have this type of fracture. Older people, particularly those with osteoporosis, are at higher risk.

It’s good to remember that not all fractures are of a person’s arm or leg. Trauma to the head, chest, spine, or pelvis can fracture bones such as the skull and ribs. And, if this isn’t bad enough, these fractures are further complicated by damage to the underlying body parts that the bone normally protects for example the lungs or brain.

Some of these fractures can be difficult to manage using first aid only as they may be life-threatening injuries. Always call 000 (Ski Patrol) if you suspect this type of fracture.

Signs and Symptoms of Bone Fractures

The symptoms of a fracture depend on the particular bone and the severity of the injury but may include:

  • Pain, swelling and bruising
  • Deformity or an inability to use the limb
  • A bone sticking out through the skin
  • Grating noise when the limb is moved

Complications of a Fracture May Include

  • Blood loss – bones have a rich blood supply. A bad break can make you lose a large amount of blood
  • Injuries to organs, tissues, or surrounding structures – for example, the brain can be damaged by a skull fracture. Chest organs can be injured if a rib breaks
  • Shock

Fracture Management

As with any First Aid incident, our primary action plan is DRSABCD and calling Ski Patrol or Triple Zero (000).

If you know the casualty has a broken bone, or you suspect a bone fracture, you should:

  • Keep the person still – do not move them unless there is an immediate danger, especially if you suspect a fracture of the skull, spine, ribs, pelvis, or upper leg.
  • Attend to any bleeding wounds first. Stop the bleeding by pressing firmly on the site with a clean dressing.
  • If a bone is protruding, apply pressure around the edges of the wound.
  • If bleeding is controlled, keep the wound covered with a clean dressing.
  • Never try to straighten broken bones.
  • For a limb fracture, provide support and comfort such as a pillow under the lower leg or forearm. However, do not cause further pain or unnecessary movement to the broken bone.
  • Use a sling to support an arm or collarbone fracture.
  • Raise the fractured area if possible and apply a cold pack to reduce swelling and pain. Do not raise the fractured area if it causes the casualty further pain or discomfort.
  • Stop the person from eating or drinking anything until they are seen by a doctor, in case they need surgery.
  • Reassure and monitor their condition and, if you feel you need medical help, call Triple Zero (Ski Patrol) for an ambulance.

Apply a splint to the fractured limb. Splints do not have to be professionally manufactured. Items like wooden boards and folded magazines can work for some fractures. You should immobilise the limb above and below the fracture using padding between the splint and the limb. If you can, apply two splints, placing one on each side of the fracture.

It is also a good idea to use wide bandages if possible so you’re able to check the casualty’s circulation in both the area of the injury and throughout their entire body.

Head Injuries – Concussion

A concussion is common in Snow Sports and can be challenging to identify and manage across sporting settings, from recreational environments to elite teams.

A concussion is a mild traumatic brain injury that follows some trauma to the head. It’s usually diagnosed by a doctor, and symptoms of concussion can persist for up to three weeks after trauma.

Advise the casualty to be alert for any danger signs over the next one or two days, such as:

  • persistent vomiting,
  • loss of coordination, or
  • bad or worsening headaches despite pain-relieving medication

Any trauma to the head may result in a concussion, and sometimes the signs and symptoms of concussion are difficult to recognise.

It is especially important that all casualties who have sustained a head injury, regardless of severity,  seek assessment by a health care professional or at a hospital.

Conclusion

Well, that was a fairly large blog, but it has given you some excellent information about common winter sports injuries (If I do say so myself…). And for those unaware of the meaning of “Host a yard sale” when used in snow sports, according to the Urban Dictionary – “When a skier or snowboarder eats it on the slopes and loses all of their gear.”

If a skier loses his skis, poles, hat, goggles, and anything else, you can shout “YARD SALE” from the ski lift above him.

For all you gapers and Jerrys out there, check this out, you might learn something!

And lastly, for more on Head and spinal injuries, check out my blog on that subject.

Well, that’s that. Until next time… Stay safe!

Don’t go out there…..It’s FREEZING!

Don't go out there. It's freezing.

Winter, Frostbite & Hypothermia

We all know how cold, wet, and miserable this time of year can be in most parts of southern Australia.

However, winter is also the season when millions – 4,1882,000 in 2019 to be exact! –  of people make their annual pilgrimage to the Victorian snowfields of the Australian Alps, and the phrase “Don’t go out there…. It’s FREEZING!”, becomes meaningless and is ignored.

Of those 4.1 million almost half are day visitors which means over 2 million will stay at least one night on whatever mountain they are visiting.

As with any concentration of people there is a risk of injuries. Combine that concentration with physical activities such as skiing, snowboarding, hiking etc, and you increase that risk of injury many times over.

In this post I am going to talk about Hypothermia and frostbite. The follow up post, Part 2, will cover physical injuries you may encounter on the snowfields, sprains and strains, broken bones, head injuries etc.

The Human Body and Hypothermia

Our bodies constantly adapt their temperature to environmental conditions. Our internal body temperature, called the core temperature, is regulated by a part of our brain called the hypothalamus.

The hypothalamus checks our current body temperature and compares it with the normal body temperature of about 37°C.

If our temperature is too low, the hypothalamus makes sure that the body generates and maintains heat. If, on the other hand, our current body temperature is too high, heat is given off or sweat is produced to cool the skin.

The hypothalamus automatically adjusts keep our internal body temperature at an average of 37°C.

If our core temperature falls below, 37°C then we may experience Hypothermia.

What is Hypothermia?

Exposure to cold conditions can lead to generalised cooling of the body, localised cold injury, and/or Hypothermia (a combination of the prefix ‘hypo-‘, meaning ‘below’, and the word ‘thermē’, which translates from the Greek as ‘heat’).

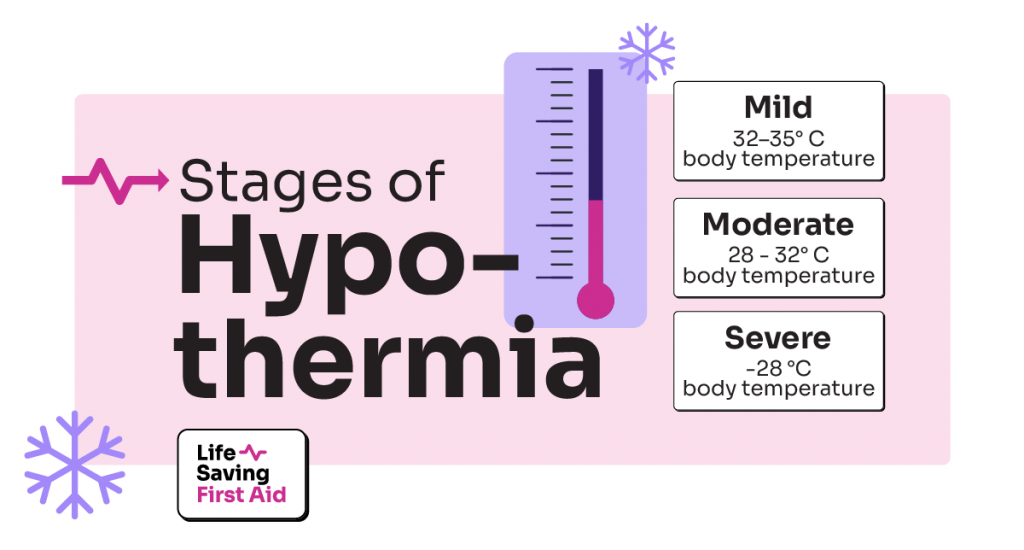
Hypothermia occurs when the body’s temperature drops below 35°C and it cannot warm up by itself.

As the body temperature falls, systems and organs progressively fail until death occurs.

Hypothermia may develop rapidly, for example by falling into icy water.

However, it is more common that hypothermia is a gradual process, such as when someone experiences prolonged exposure to cold conditions such as cold weather, lying on a cold floor, or being buried under snow by an avalanche.

Infants and the elderly are at a greater risk of hypothermia. 

Infants because they have a larger surface area compared to body weight so they can lose body heat faster than older children and adults.

And the elderly because their ability to become aware of temperature change is impaired due to the loss of nerve endings to the skin. Also, less fat on their body which has an insulating function, and a lower metabolic rate, means they generate less body heat themselves.

Ok, how does the body lose heat anyway?

Well, basically there are four ways that the human body loses heat:

  • Conduction – by direct transfer from the body to an object that is cooler than the body. For example, lying on a cold surface will pass body warmth to the surface away from the body.
  • Convection – air or liquid flow across the skin drawing off heat . For example, wind will increase heat loss, as will water that is cooler than body temperature.
  • Radiation – electromagnetic waves distribute heat into the ambient environment For example, exposed skin will allow heat to be drawn off if the air temperature is less than the body – the exposed head of a person is a strong source of heat loss, particularly in children.
  • Evaporation – fluid on the skin turns to vapour, drawing off heat. Moist skin will lose heat more rapidly, such as in someone who is wet, clammy or has exposed moist skin, such as burns.

So now you understand why it is so important to stay dry, sheltered from the wind, and wear good quality warm clothing when enjoying our wonderful snow-covered peaks.

Oh… and don’t forget… keeping your feet warm and dry as well.

What happens when body temperature starts to fall?

A couple of things usually occur which can indicate that the person’s body temperature is falling and they, and their bodies, are trying to keep warm.

They are:

  1. Behavioural – the person will try and move around to generate heat and seek shelter from further heat loss.
  2. Physiological – the body moves blood from the extremities to the core to keep it warm.
  • Body hair stands on end to trap a layer of warm air around us (goose bumps),
  • We shiver to make more heat, and
  • Our body (the hypothalamus) releases hormones to speed up our metabolism to create more heat.

If these measures don’t work, yep you guessed it, hypothermia will result.

Hypothermia Signs and Symptoms

So, as I mentioned earlier, hypothermia is usually a gradual process with the person going through various stages.

Stages of Hypotermia

Mild hypothermia: 32–35°C body temperature

  • The casualty will be shivering – the body trying to keep warm by stimulating muscles.
  • Their skin will be pale and cool – blood supply restricted to keep internal organs warm.
  • They may have impaired coordination, slurred speech with possibly delayed responses.

Moderate hypothermia: 28–32°C body temperature

  • The casualty will stop shivering and experience increasing muscle stiffness.
  • They will be confused and become less responsive.
  • Their blood pressure will drop, and they will have a slow, irregular pulse.

Severe hypothermia: Less than 28°C body temperature

The casualty may display all the signs and symptoms of moderate hypothermia as well as

  • be very cold to touch, unresponsive, rigid,
  • dangerous heart rhythms
  • cardiac arrest
  • or they may appear lifeless, with fixed and dilated pupils, particularly if they have a weak slow pulse.

Never assume a person is dead. A person with severe hypothermia may only take one breath per minute, with a heart rate of less than 20 beats per minute.

Hypothermia Management

When you notice the signs of hypothermia, you should apply the following guidelines:

  • Follow DRSABCD. Don’t forget you need to be aware of your own risk of developing hypothermia in cold environments and should monitor your own status as well as that of the affected person.
  • Dial Triple Zero (000) for an ambulance if the casualty’s condition is severe.
  • If possible, move the casualty to a warm, dry place, remove any wet clothing from the casualty and if they are fully conscious give them a warm sugary drink, no alcohol or coffee.
  • Avoid any excess activity and help the casualty to lay down in a comfortable position.
  • Warm the casualty with blankets or an emergency blanket making sure you cover the casualty’s head to maintain body heat. You can also use body to body contact to warm the casualty.
  • Use heat packs and place them on the neck, armpits, or groin. Be careful not to burn the casualty.
  • Reassure and stay with the casualty until medical aid arrives.

Frostbite (or Freezing Cold Injury)

Frostbite occurs when tissues freeze.

This happens in cold environments when blood vessels constrict and reduce blood flow and oxygen to the extremities such as the fingers and toes. However, it can affect any part of the body.

Management of a freezing cold injury is the same as for severe hypothermia plus rewarming of the affected parts.

  • When rewarming, it is important that you warm them up slowly. Use body heat and blanket. DO NOT rub the affected tissue or use radiant heat (i.e. sit by a fire).
  • Affected fingers may be placed in the opposite armpit, the armpit of a companion, or a warm hand over a frostbitten cheek or ear while feet can be reheated on the warm abdomen (under clothing) of a companion
  • If you have rewarmed frostbitten body parts you must ensure that re-freezing does not occur.

Remember to continually monitor the casualty’s breathing. If their breathing stops, start cardiopulmonary resuscitation (CPR) immediately. Continue CPR until the person starts breathing on their own, medical help arrives, you become exhausted, or it becomes too dangerous to continue.

Once the colour and consistency of the skin have been restored, the person can safely resume normal activity, provided they increase their insulation and take precautions against recurrence i.e., refreezing.

The Impact of Alcohol in Hypothermia and Frostbite

One last note, if you are a fan of the ‘Après Ski’ activities. all toasty by the chalet fire, with a snifter of brandy or whatever you prefer to warm your toes, be aware of the effect of alcohol on your body.

Alcohol relaxes the blood vessels allowing more blood to flow near the skin. This makes people feel cosy, giving a flushed appearance, and a warm sensation.

However, blood flowing near the skin increases the rate of heat loss, and the alcohol slows down your metabolism, which slows down internal heat generation.

If you have had too much to drink, there is now a significant risk of hypothermia if you go outside in cold weather.

Alcohol also impairs judgement, so you are less likely to recognise the environment, your own physical condition, and then less likely to take protective measures against heat loss.

This also applies to any other mind-altering substance.

Conclusion

  • In all cases of hypothermia, the first thing to do is to prevent any further heat loss. Do this by removing the four ways that heat loss occurs mentioned earlier i.e.: conduction, convection, radiation, and evaporation.
  • Follow DRSABCD. Don’t forget you need to be aware of your own risk of developing hypothermia in cold environments and should monitor your own status as well as that of the affected person.
  • If possible, move the casualty to a warm, dry place, remove any wet clothing from the casualty and, if they are fully conscious, give them a warm sugary drink, or coffee.
  • Warm them slowly – body heat. No friction or radiant heat from the fire.
  • No alcohol – Don’t be PISSED on the PISTE!

If you DO go to the snow even for just a day trip, remember: keep warm and dry and watch out for your family and friends.

Well, that’s that. Until next time… Stay safe!

Adrian

Finding available course dates and times for your selected course and location...